In this document we run pg2b3dm on a sample dataset, a shapefile from Delaware containing building footprints with a height attribute. The generated 3D tiles are visualized in a CesiumJS/Mapbox GL JS v3 beta/Cesium for Unreal viewer.
We download a dataset from the US Building Footprints.
https://wiki.openstreetmap.org/wiki/Microsoft_Building_Footprint_Data
Download dataset:
Delaware - Dover (22,532 buildings available)
https://1drv.ms/u/s!AqWv0F0N63JkgQqO6E9e2kI28R16
Donwload zip, unzip. It contains a 'bldg_footprints.shp' shapefile with building height column.
-
PostGIS database
-
.NET 6.0 SDK https://dotnet.microsoft.com/download/dotnet/6.0
-
GDAL (ogr2ogr)
Import the buildings to database using ogr2ogr.
$ ogr2ogr -f "PostgreSQL" PG:"host=localhost user=postgres password=postgres dbname=postgres" bldg_footprints.shp -nlt POLYGON -nln delaware_buildings
In PostGIS, a spatial table 'delaware_buildings' is created.
postgres=# ALTER TABLE delaware_buildings ADD COLUMN  geom_triangle geometry;
postgres=# ALTER TABLE delaware_buildings ADD COLUMN style json;
postgres=# ALTER TABLE delaware_buildings ADD COLUMN shaders json;
Update the style column with a JSON file containing walls, roof, floor colors:
Colors used:
#008000: green (floor)
#FF0000: red (roof)
#EEC900: yellow (wall)
postgres=# UPDATE delaware_buildings SET style = ('{ "walls": "#EEC900", "roof":"#FF0000", "floor":"#008000"}');
The 'shaders' column will be filled in next 'bertt/tesselate_building' step.
Install tool tesselate_building
$ dotnet tool install --global tesselate_building
When installation gives problems try with:
$ dotnet tool install -g --add-source 'https://api.nuget.org/v3/index.json' --ignore-failed-sources tesselate_building
Tool tesselate_building does the following:
-
reads the footprint heights and geometries (from wkb_geometry);
-
extrudes the buildings with height value;
-
triangulate the building and gets the colors per triangle;
-
writes geometries to column geom_triangle (as polyhedralsurface geometries);
-
writes shaders info (color code per triangle) into shaders column;
Note: For Mapbox GL JS v3 beta support use '-f mapbox' in the following step.
$ tesselate_building -h localhost -U postgres -d postgres -f cesium -t delaware_buildings -i wkb_geometry -o geom_triangle --idcolumn ogc_fid --stylecolumn style --shaderscolumn shaders
Tool: Tesselate buildings 0.3.0.0
Password for user postgres:

Connected to database.

Table: delaware_buildings
Progress: 100.00%
Elapsed: 190 seconds
Program finished.
After running, columns 'geom_triangle' and 'shaders' should be filled with the correct information.
The geom_triangle column contains PolyhedralSurfaceZ geometries consisting of triangles.
In SQL add a spatial index on the geom_triangle column for fast performance:
psql> CREATE INDEX ON delaware_buildings USING gist(st_centroid(st_envelope(geom_triangle)));
The shaders column contains json information like:
{
  "PbrMetallicRoughness": {
    "BaseColors": [
      "#008000",
      "#008000",
      "#FF0000",
      "#FF0000",
      "#EEC900",
      "#EEC900",
      "#EEC900",
      "#EEC900",
      "#EEC900",
      "#EEC900",
      "#EEC900",
      "#EEC900"
    ]
  }
}
In this case PbrMetallicRoughness shader will be used, for all the triangles there is a color code.
Install pg2b3dm:
$ dotnet tool install --global pg2b3dm
Run pg2b3dm, the program will make a connection to the database and 1 tileset.json and 927 b3dm's will be created in the output directory.
$ pg2b3dm -h localhost -U postgres -c geom_triangle -t delaware_buildings -d postgres -a ogc_fid --shaderscolumn shaders
Output:
Password for user postgres:
Start processing 2024-01-04T10:55:13....
Input table: delaware_buildings
Input geometry column: geom_triangle
Spatial reference of delaware_buildings.geom_triangle: 4326
Spatial index detected on delaware_buildings.geom_triangle
Query bounding box of delaware_buildings.geom_triangle...
Bounding box for delaware_buildings.geom_triangle (in WGS84): -75.59158711, 39.08939264, -75.44656349, 39.23050979
Height values: [0 m - 76.58 m]
Default color: #FFFFFF
Default metallic roughness: #008000
Doublesided: True
Create glTF tiles: True
Attribute columns: ogc_fid
Center (wgs84): -75.51907530249994, 39.15995121350005
Starting Cesium mode...
Translation ECEF: 1238318.875,-4794808.5,4006101.5
Lod column:
Geometric errors: 2000,0
Refinement: REPLACE
Geometric error used for implicit tiling: 2000
Add outlines: False
Use 3D Tiles 1.1 implicit tiling: True
Maximum features per tile: 1000
Start generating tiles...
Creating tile: 3_5_4.glb
Tiles created: 60
Writing 33 subtree files...
Available Levels: 5
Subtree Levels: 3
SubdivisionScheme: QUADTREE
Writing output/tileset.json...

Elapsed: 9 seconds, 982 milliseconds
Program finished 2024-01-04T10:55:23.
Copy the generated tiles to sample_data\delaware\cesium\ (overwrite the tileset.json and sample tiles in tiles directory there).
Put folder 'sample_data' on a webserver (for example $ python3 -m http.server) and navigate to /delaware/cesium/index.html
If all goes well in Delaware - Dover you can find some 3D Tiles buildings.
Sample live demo in Cesium: https://geodan.github.io/pg2b3dm/sample_data/delaware/cesium/
In pg2b3dm use options --create_gltf false --use_implicit_tiling false
Required:
-
Installation Unity3D with plugin 'Cesium for Unity3D' - current version is 1.6.2
-
Use -f cesium in previous step tesselate_building.
Copy the generated tiles to webserver (for example $ python3 -m http.server)
-
In Unity3D open sample Assets - CesiumForUnitySamples - Scenes - 05_CesiumMetadata
-
In the hierarchy navigate to CesiumGeoReference - NYC Buildings - Inpspector
-
In the Inspector change 'Tileset source' from 'From Cesium Ion' to 'From Url'
-
In the Inspector change 'URL' to the url pointing to tileset.json
-
In the Hierarchy go to CesiumGeoReference and change the Latitude, Longitude to 39.15, -75.51
-
In the Hierarchy go to CesiumGeoReference DynamicCamera, in the Inspector go to 'Cesium Globe Anchor' and change the Latitude, Longitude to 39.15, -75.51
In the Game View the buildings should be visible.
See demo https://geodan.github.io/pg2b3dm/sample_data/delaware/mapboxv3
In pg2b3dm use options --create_gltf false --use_implicit_tiling false
Required:
- Installation Unreal Engine with plugin 'Cesium for Unreal' - version 1.15.1 and above
- Use -f cesium in previous step tesselate_building.
Copy the generated tiles to webserver (for example $ python3 -m http.server)
-
In Unreal create a new blank project
-
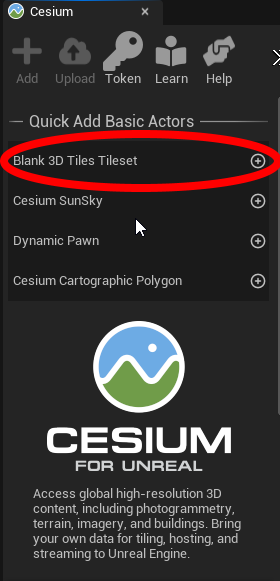
In Unreal press '+' next to 'Blank 3D Tiles Tileset' in the Cesium panel
-
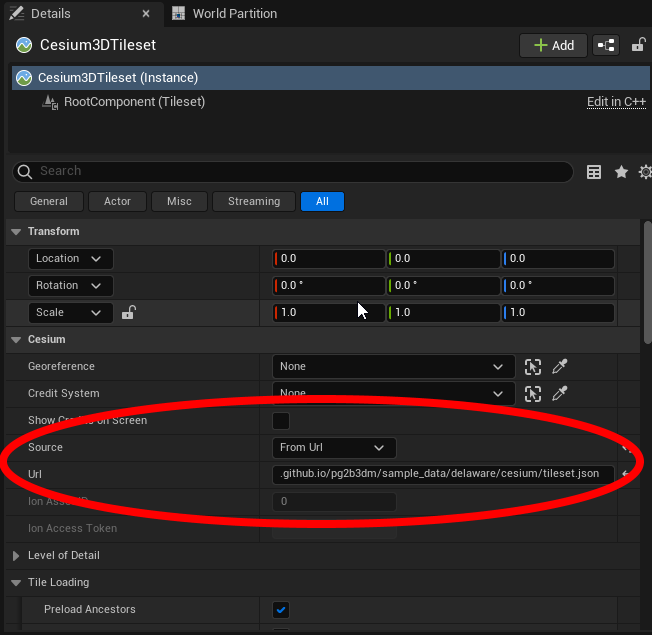
In the Outliner - Cesium3DTileset properties change property Source from 'From Cesium Ion' to 'From Url'
-
In the Outliner - Cesium3DTileset properties change property Url from to the url (inclusing tileset.json - for example http://localhost:8000/tileset.json)
-
Double click left mouse button on Item 'Cesium3DTileset' to zoom to the 3D Tiles.
-
Disable Outliner - Lighting - ExponentialHeight Fog
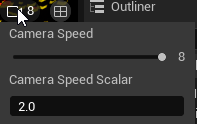
- Change camera speed for better navigation (using right mouse click - wasd keys)
. Camera speed to 8
. Camera speed scalar to 2
- Deselect buildings by click in the view
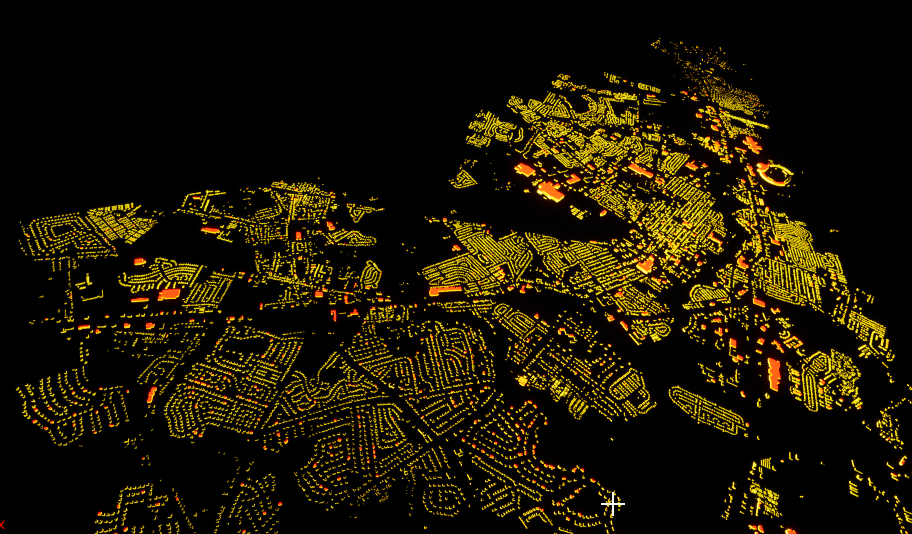
If all goes well the 3D Tiles the 3D Tile buildings should be visualized.


