


3D engines have support for bone physics, this can be used for a wide variety of things:
-
Hair that reacts to motion, gravity, and wind.
-
Antennas, wings, tails, etc.
-
Breast / butt / muscle jiggle.
-
Ragdoll physics.
-
Simple cloth physics (faster than using real cloth physics, but not as realistic).
-
Collision detection with the environment based on simple hitboxes.
-
Exporting baked physics animations to game engines.
Blender can do all of that, however it is incredibly time consuming and tedious:
-
You must manually create a cube for every bone and align them with the bones (in the correct position, size, and rotation).
Whenever you change the bones you must manually realign the cubes.
-
You must manually set all the proper settings (rigid body, wireframe, show on top, unselectable, etc.)
-
You must manually create an empty for every cube (in the correct position and rotation) and set up constraints between the cubes.
Whenever you change the bones you must manually realign the empties.
-
You must create "blank" cubes which are parented to bones, and then attach other cubes to it.
You must remember to manually disable collisions for these blank cubes.
-
You must add
Child Ofbone constraints to the bones and useSet Inverse.You must do this again every time you change the bones.
-
You must unparent/reparent the bones when switching between Pose and Object mode.
If you try to do it by hand, you will waste hundreds of hours of time.
With this add-on, all of the above steps are automatically done for you. Rather than spending several minutes (per bone), it instead takes a couple seconds.
And best of all, this add-on creates normal Blender rigid bodies, so the performance is excellent, and it continues to work perfectly even after disabling the add-on.
That means you can send the .blend file to somebody else and they can use it without needing the add-on installed.
You must have Blender 2.91.0 or higher.
-
Go to the Releases page and download the most recent
Rigid.Body.Bones.zipfile. -
In Blender, go to
Edit -> Preferences... -
In the
Add-onstab, click theInstall...button. -
Select the
Rigid.Body.Bones.zipfile and clickInstall Add-on. -
Enable the checkbox to the left of
Physics: Rigid Body Bones. -
Save your preferences.
-
Select an Armature object:
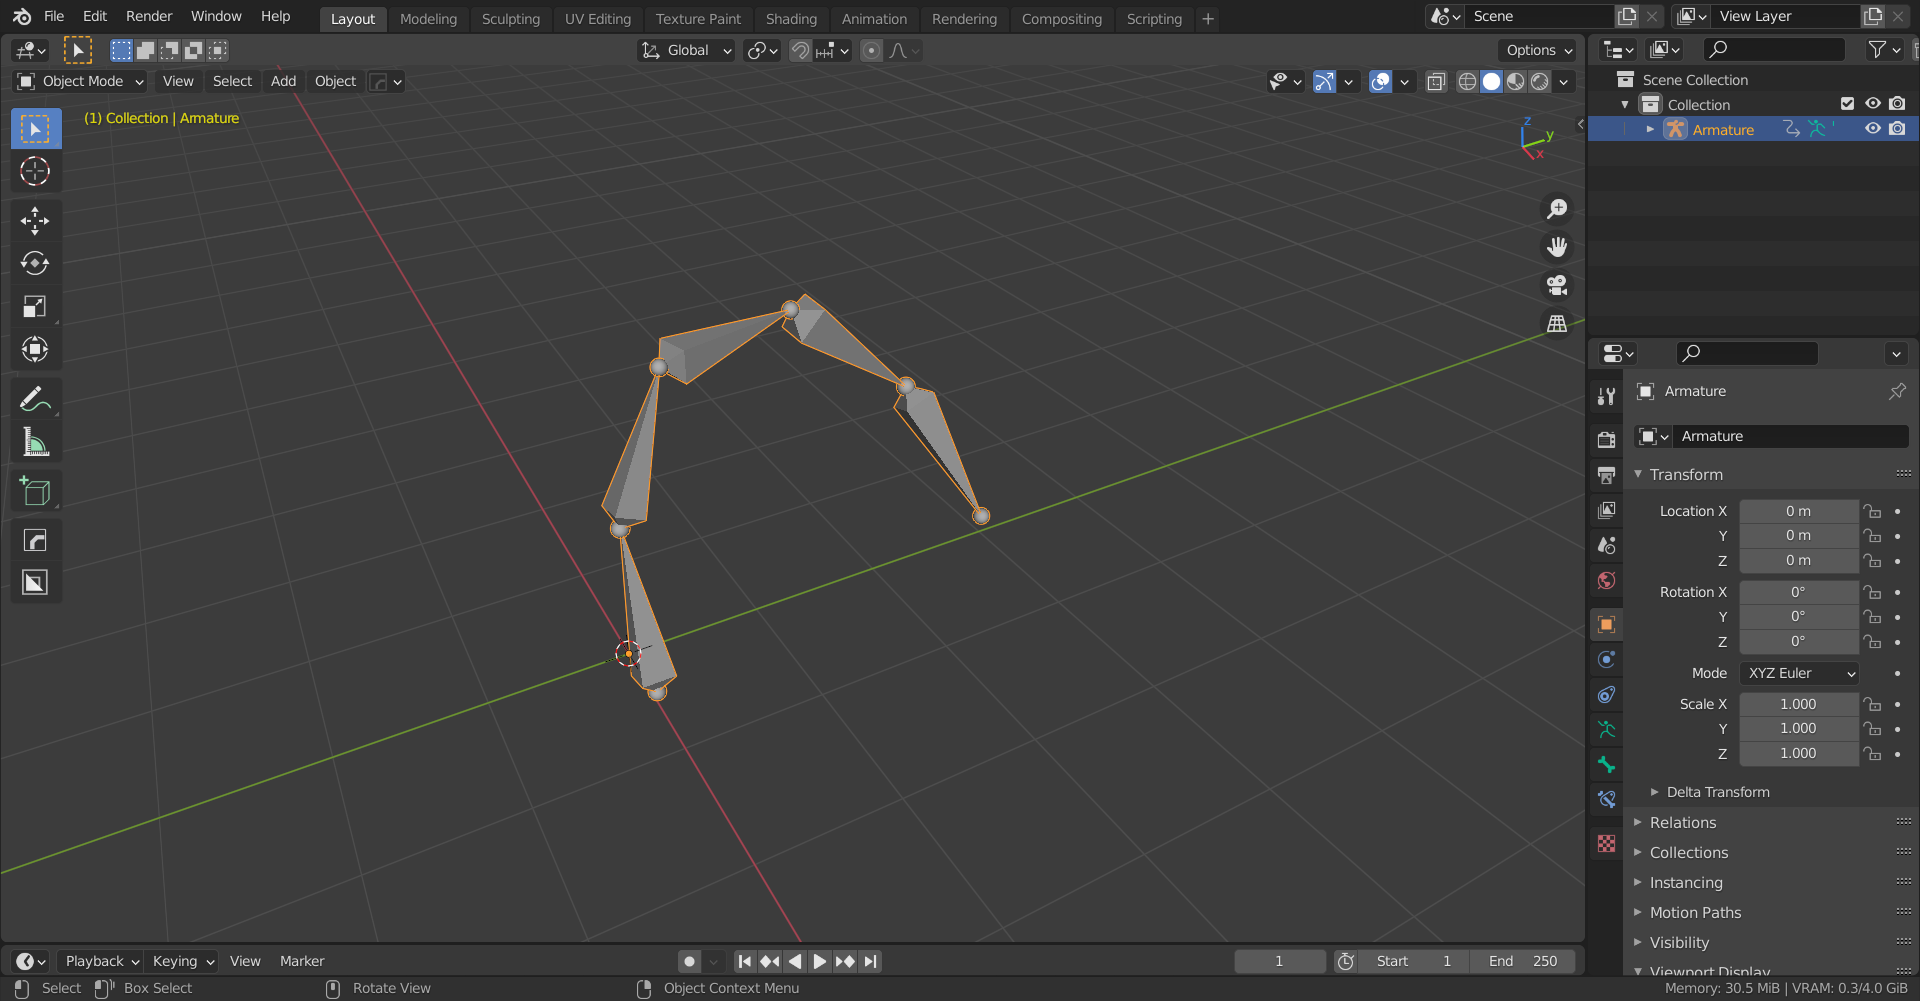
-
Go into Pose mode.
-
In the sidebar (keyboard shortcut
N) open theRigid Body Bonestab: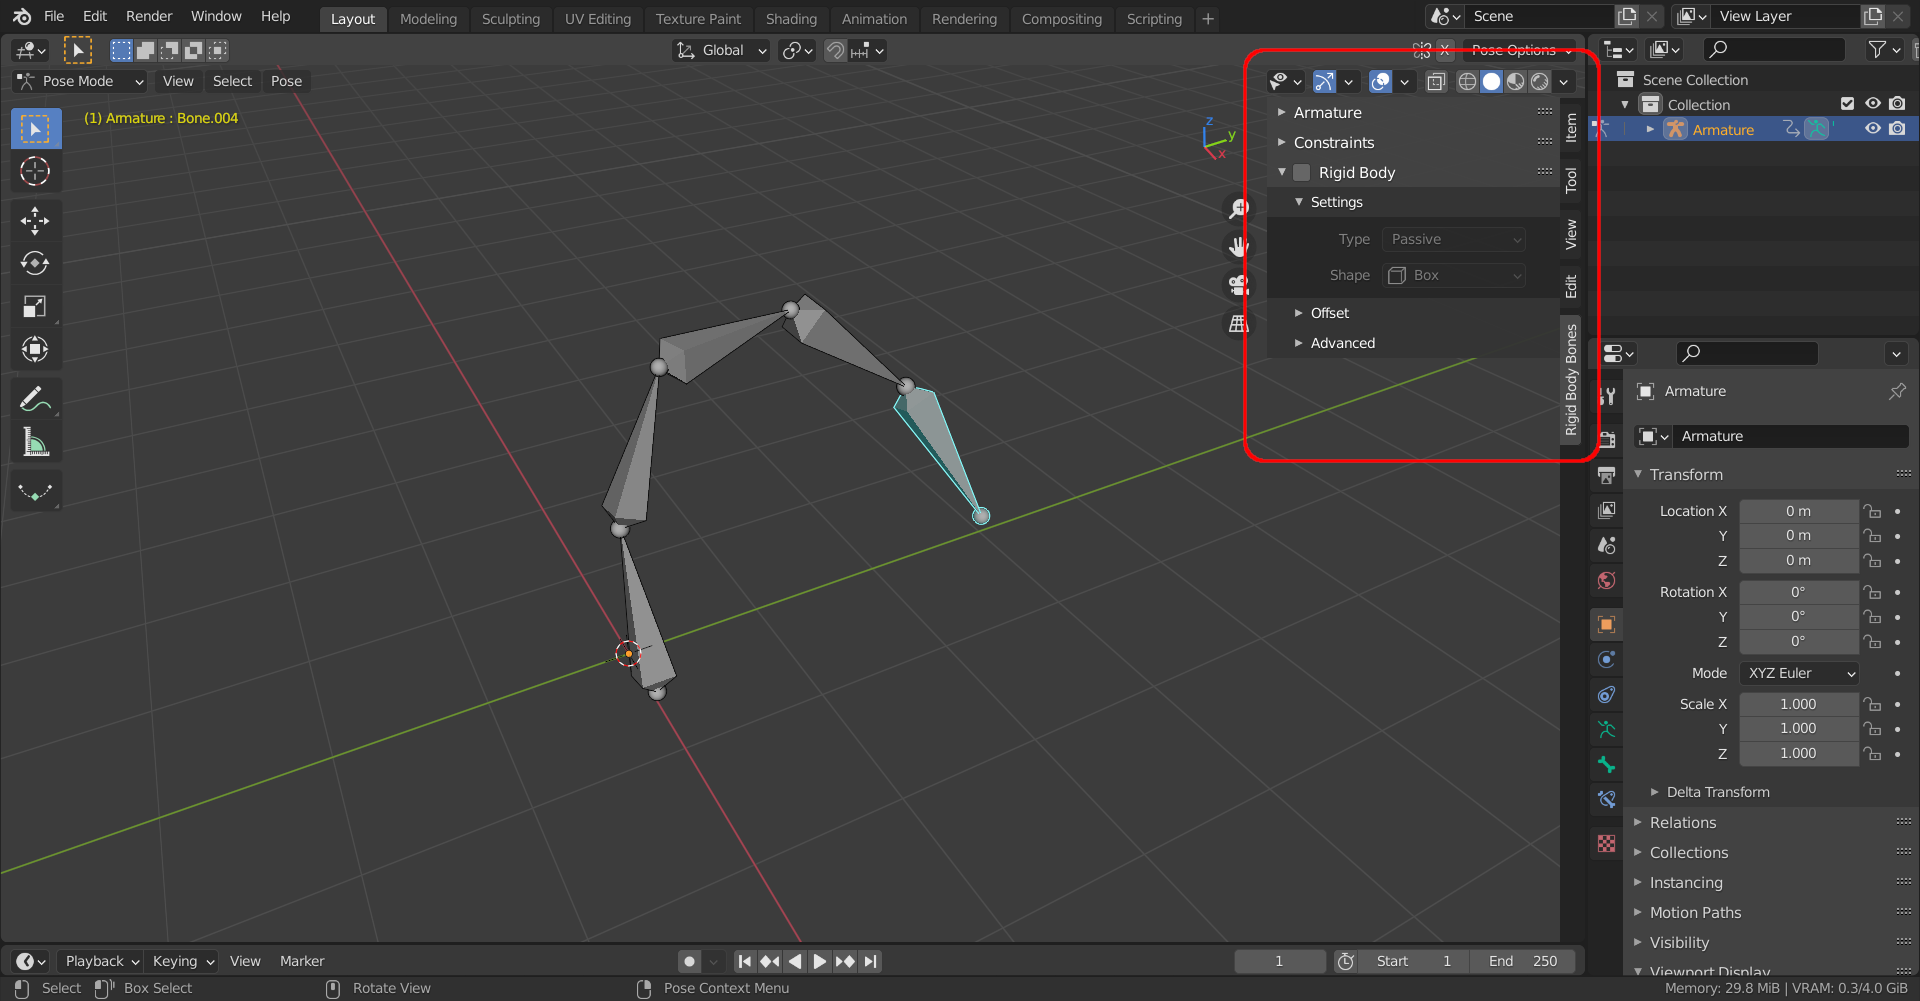
-
Select the bone that you want physics for.
-
Click the
Rigid Bodycheckbox to enable physics.If you want the bone to move automatically, change the
TypetoActive. You will probably want to change theLimitsas well.You can also enable
Springsto make the bone bouncy. And you can change the position of the hitbox inOffset.All of the rigid body options are available, the less commonly used options are in
Advanced. -
When you're done making changes, switch into Object mode and then play the animation.


-
Blender often crashes, so save often! You should especially save right before playing an animation, since that's when most crashes happen.
-
Do not put any objects into the
RigidBodyBonescollection, they will be deleted. TheRigidBodyBonescollection can only be used by this add-on. -
The
Rigid.Body.Bones.zipfile contains anexamplesfolder which contains example.blendfiles. -
If a bone is
Active, its child bones must also beActive, this is a limitation in Blender. So if the child is notActive, you must either make the childActive, or you must change it to a non-Activeparent.However, you can use
Constraintsto create joints between any bones (even if they aren't in a parent-child relationship). This works with bothActiveand non-Activebones. -
If you select multiple bones, you can hold down
Altwhen changing a setting and it will apply the setting to all the selected bones. -
It is sometimes useful to change the
Advanced -> Physics -> Damping TranslationandDamping Rotationsettings.This makes the bone move slower, like it is underwater:
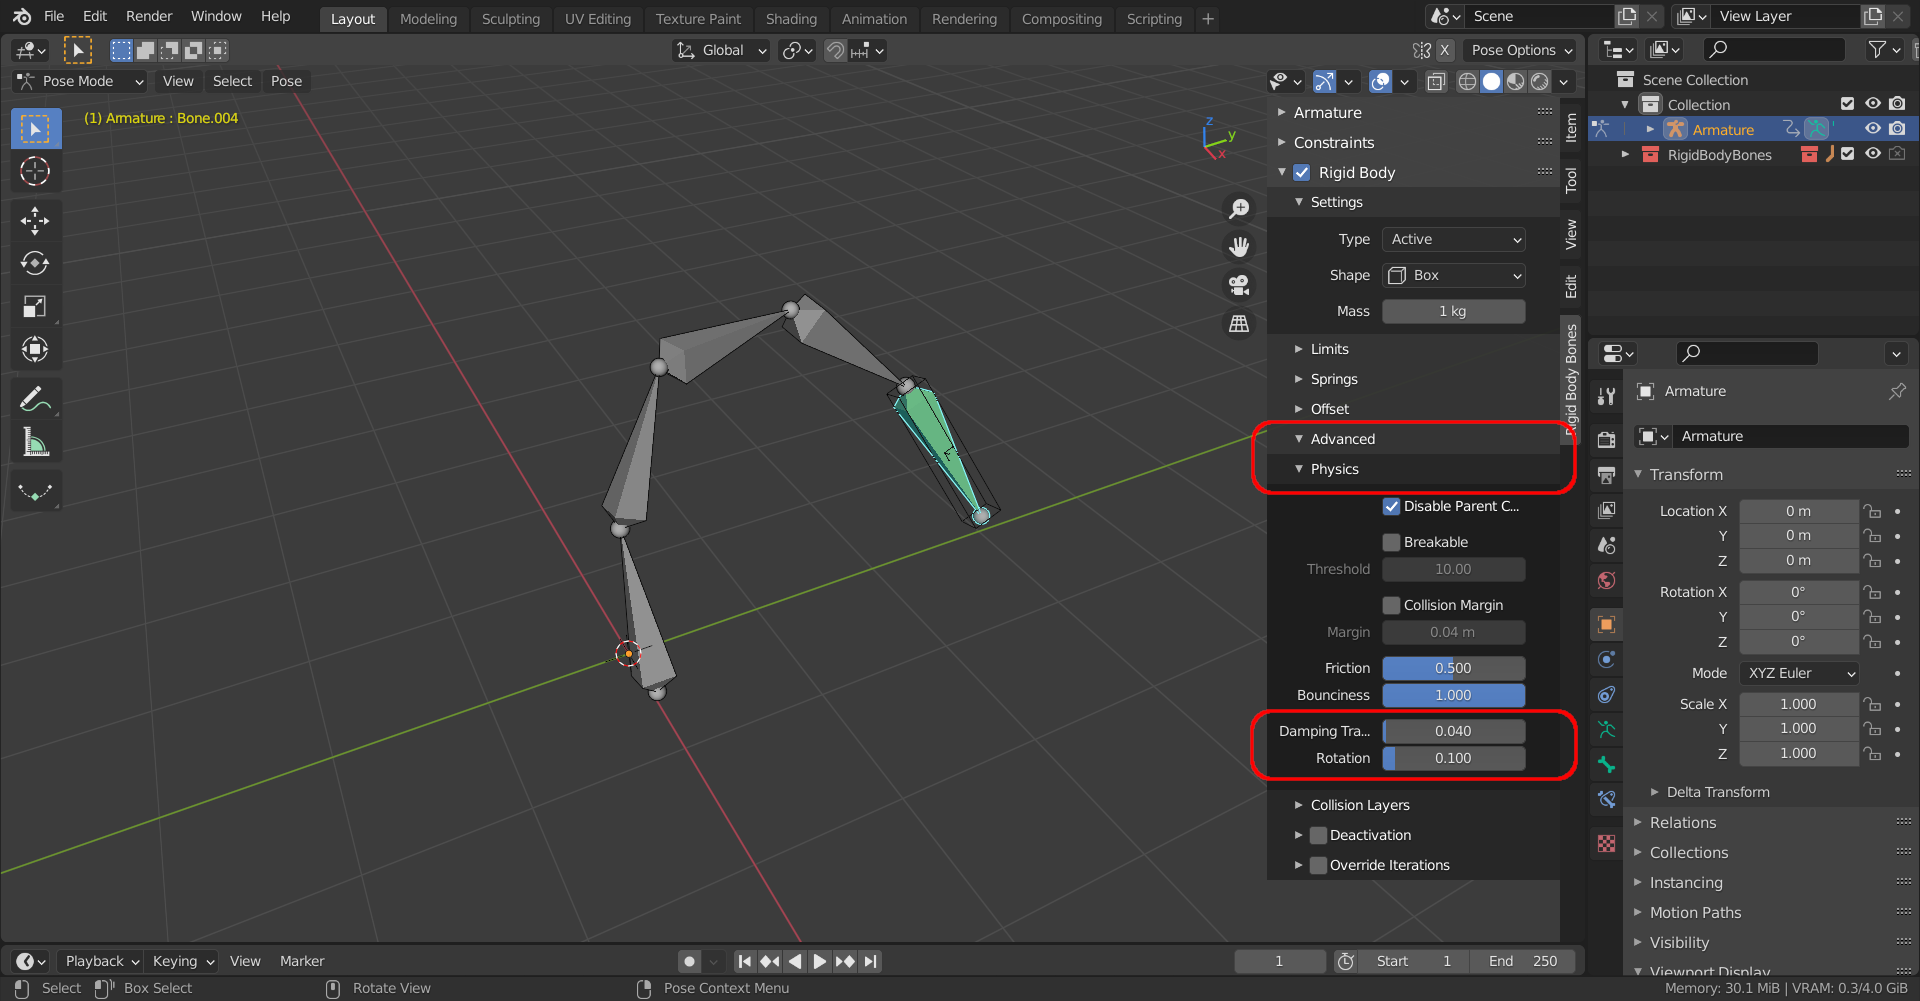
-
Inside of the
Advanced -> Collision Layerspanel you can assign the bone to a different layer, which will cause it to only collide with other objects in the same layer.You can also assign the bone to multiple layers by holding down
Shift. Or you can hold downShiftto remove it from all the layers, which means it will never collide with anything. This is useful if you want the bone to be affected by motion, gravity, and wind, but not collisions. -
You will probably need to change the
Properties -> Scene -> Rigid Body World -> Substeps Per FrameandSolver Iterationssettings.Increasing them can make the simulation more realistic, but it can also cause weird glitches, so sometimes you need to lower them.
The
Substeps Per Frameoption changes how springs behave, so be very careful when changing it: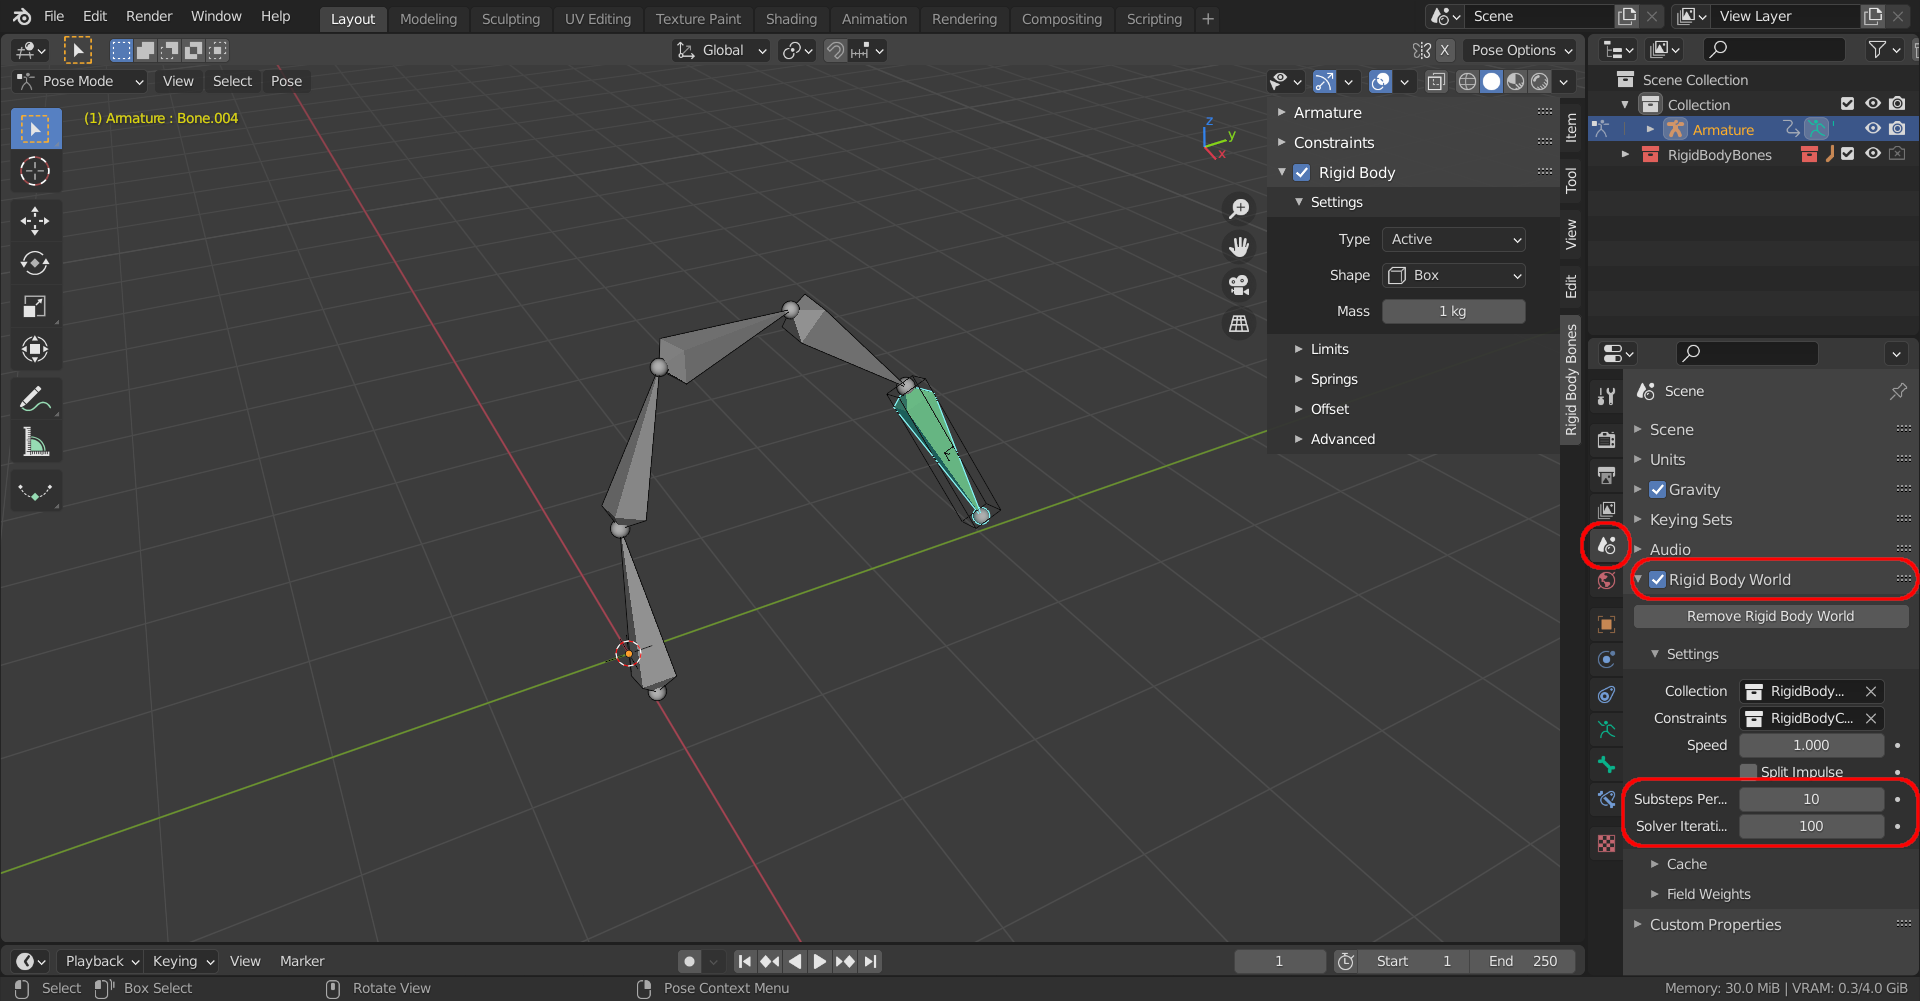
-
The
Armaturepanel contains a few useful settings which apply to the entire armature.If things somehow get messed up, turn off the
Armature -> Enable rigid body physicscheckbox, and then turn it back on: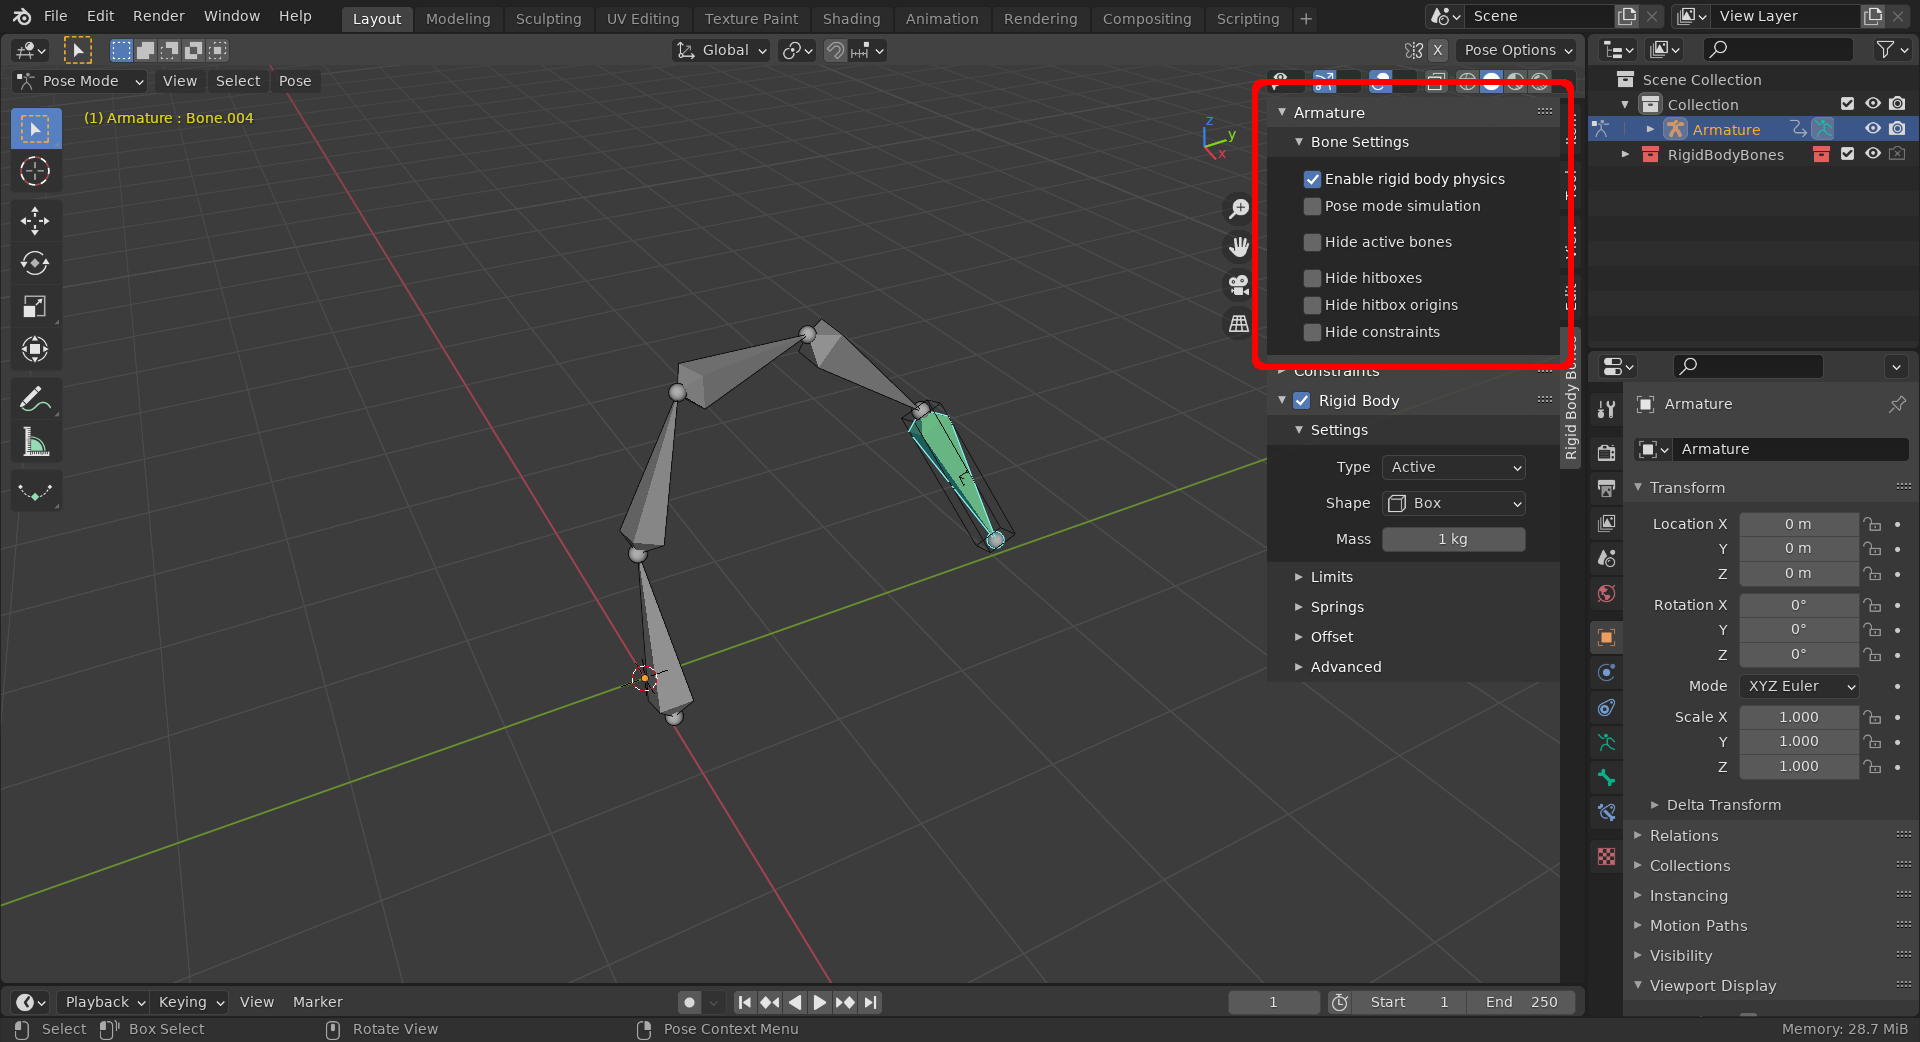
-
There is a
Pose -> Rigid Bodymenu which contains a few useful operators: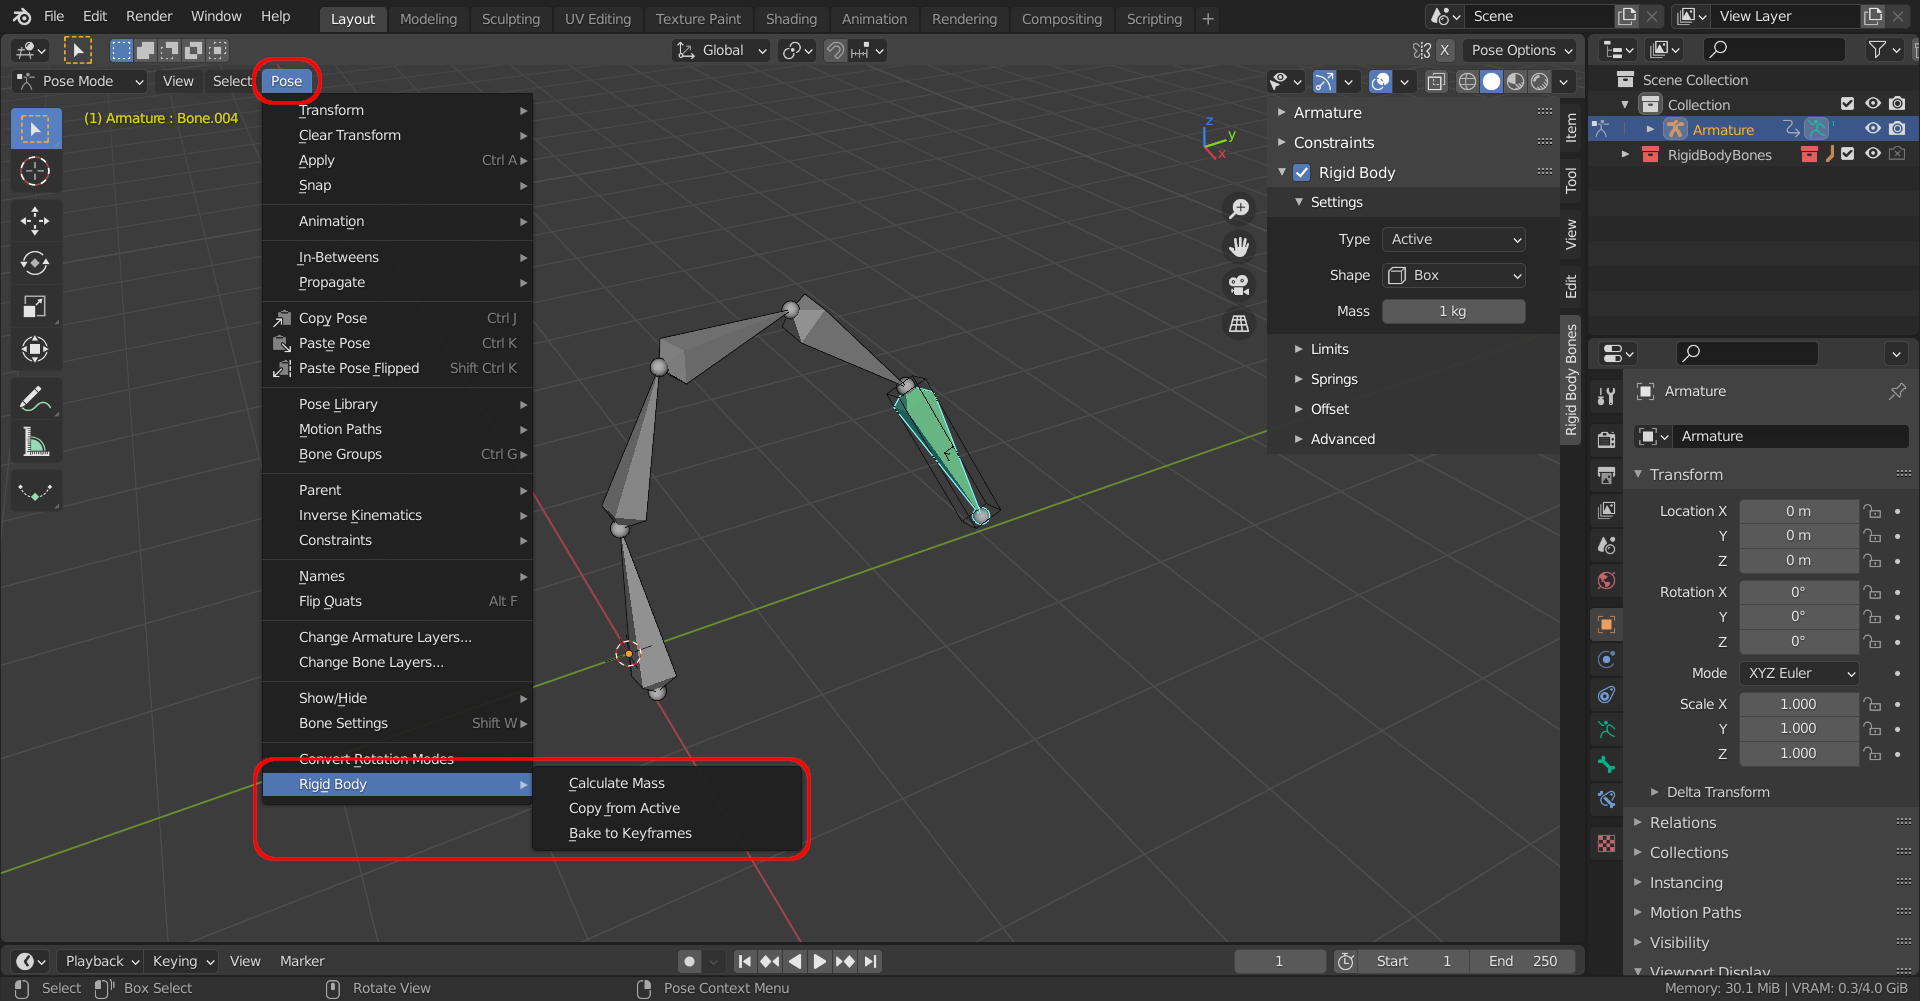
-
Calculate Masswill change the Mass of the selected bones based on their size and material type. -
Copy from Activewill copy all the rigid body settings from the active bone to the other selected bones. -
Bake to Keyframeswill bake the selected bones into keyframes, so they can be used in other engines.
-
-
There is a
Constraintspanel which allows you to create joints between a bone and another rigid body (or another bone):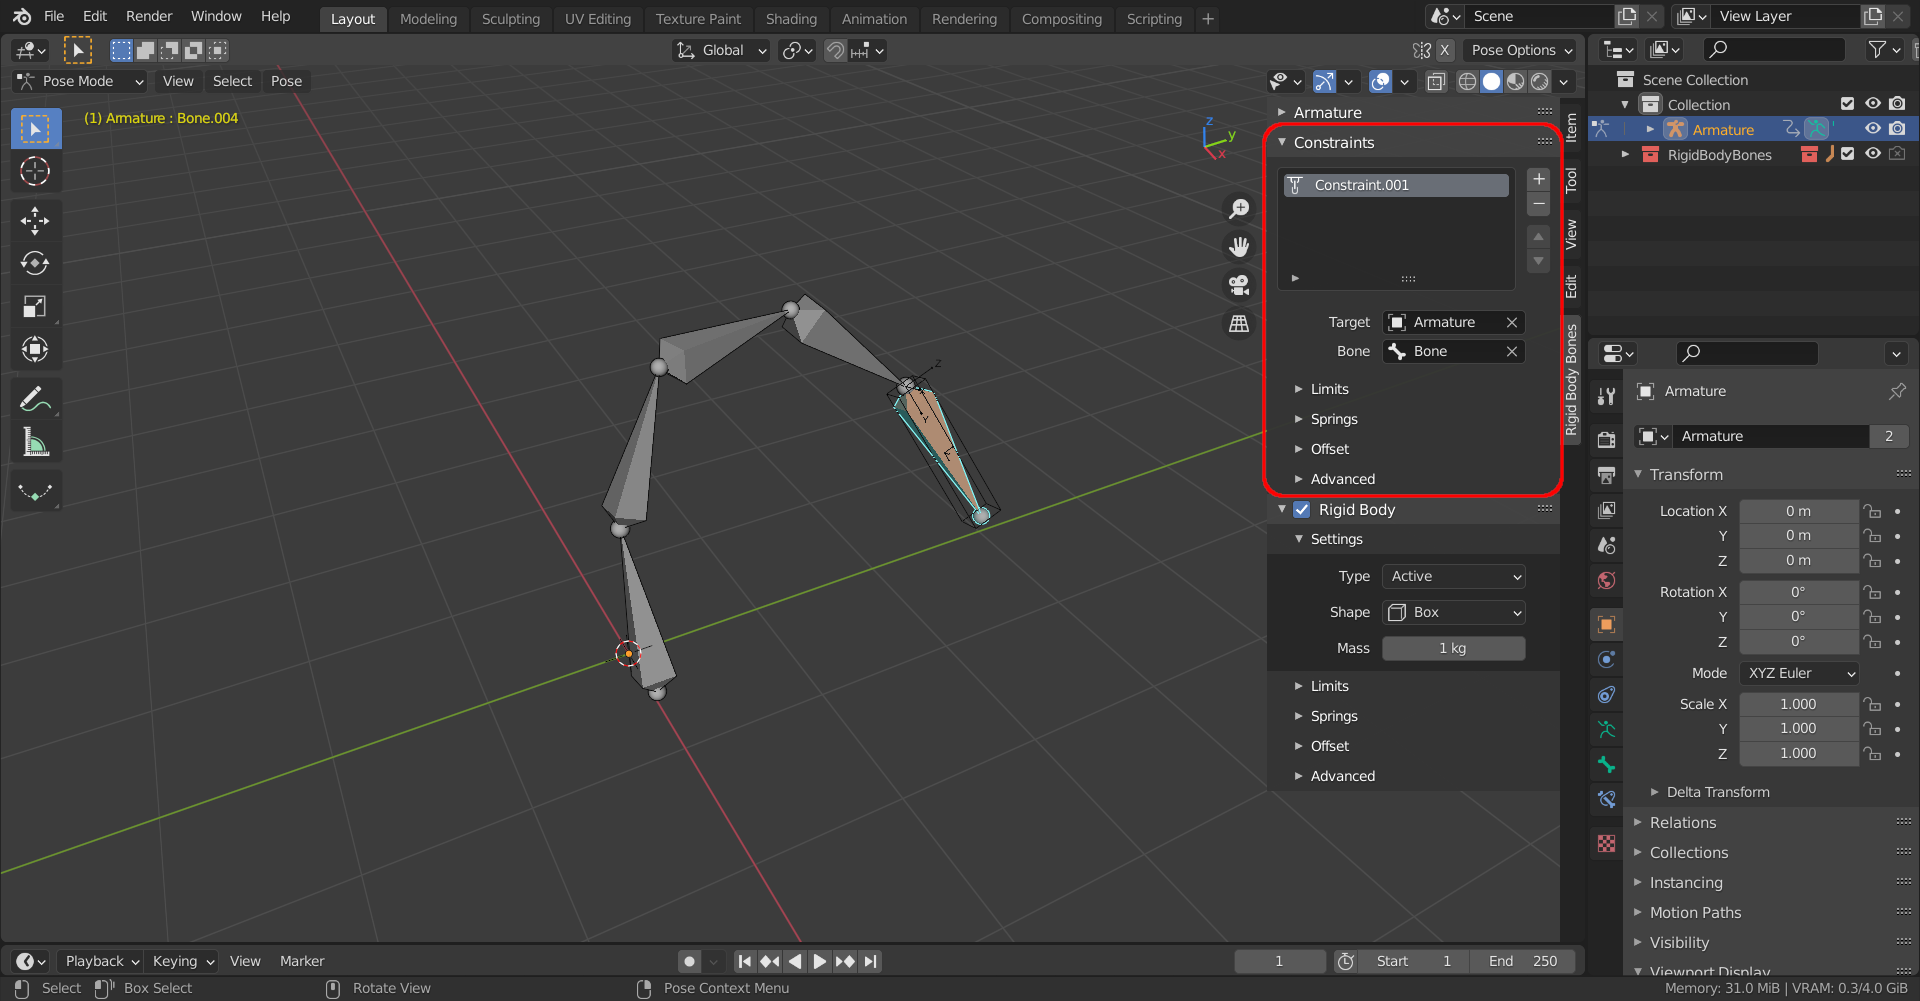
This can be used for advanced features like IK, or circular dependencies. See the
Constraints.blend,IK.blend, andMarionette.blendexamples.


If you want to modify this add-on, follow these steps:
-
git clone https://github.com/Pauan/blender-rigid-body-bones.git -
cd blender-rigid-body-bones -
blender --background --python install.pyThis will install the add-on locally.
-
Now you can open Blender normally and the add-on will be installed.
-
When you make changes to the code, close Blender and then run
blender --background --python install.pyagain.