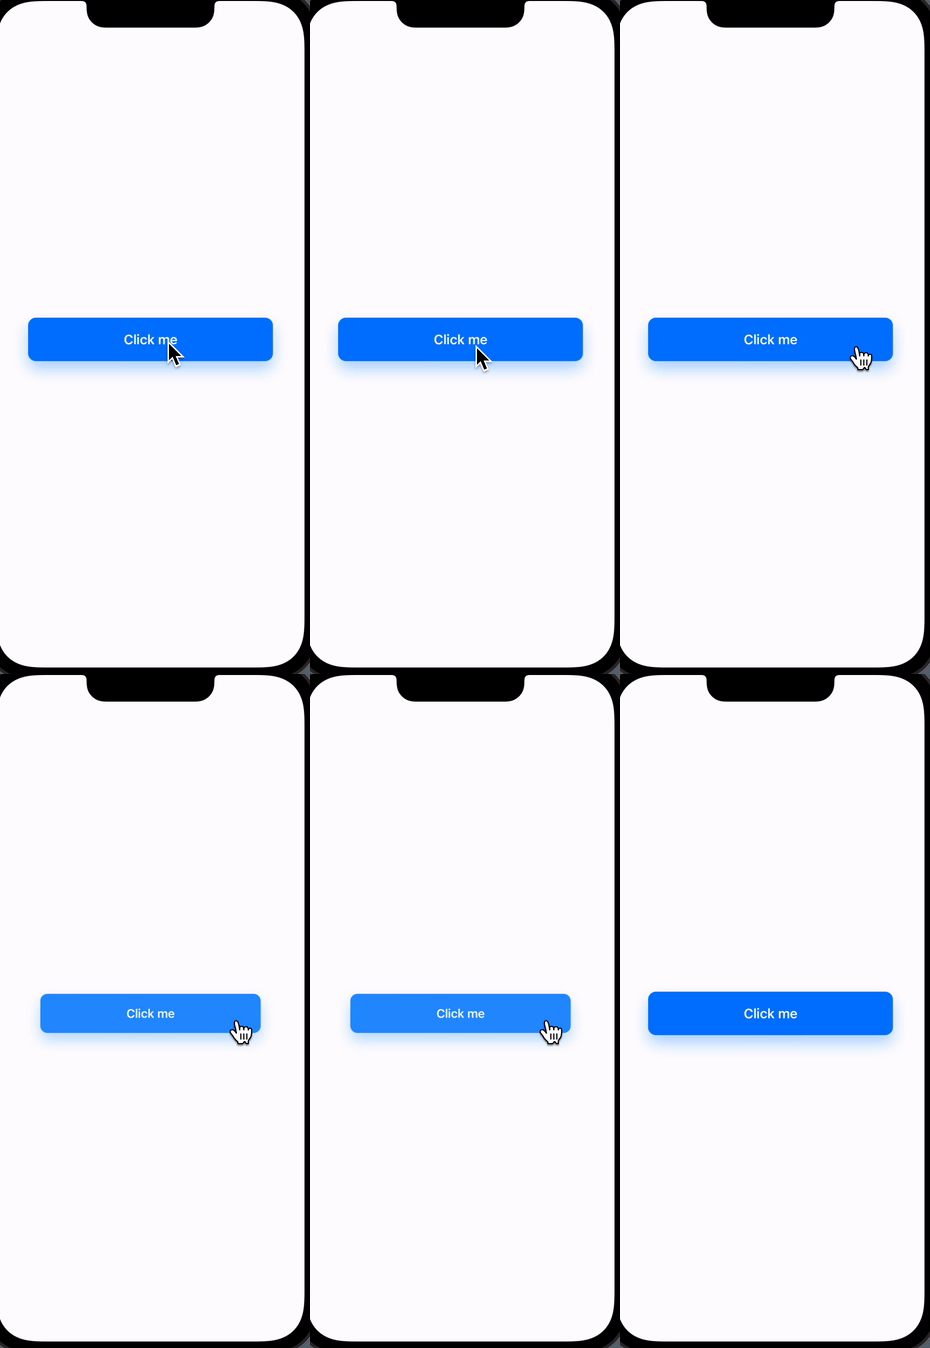
You actually use view modifiers all the time. Every time you call .font, .foregroundColor, .backgroundColor those are actually view modifiers
They take the current view they add a modifier and then return a modifiedView. All viewModifier is basically taking the current content adding something to it and then returning it back to the view
So, by creating custom viewModifier you can actually stack a bunch of regular modifiers together to create a really unique and custom formatting. The most important is probably reusability cause by using custom viewModifiers you can really control how we want all views in your app to look and we can get all of those views to refer back to a single source of truth for how that button or that view should look
// MARK: -  CUSTOM VIEWMODIFIER
struct DefaultButtonViewModifier: ViewModifier {
let backgroundColor: Color

func body(content: Content) -> some View {
content
  .foregroundColor(.white)
  .frame(height: 55)
  .frame(maxWidth: .infinity)
  .background(backgroundColor)
  .shadow(radius: 10)
  .padding()
}
}

// MARK: -  VIEW
struct ViewModifierBootCamp: View {
// MARK: -  PROPERTY

// MARK: -  BODY
var body: some View {
VStack {
  Text("Hello")
    .modifier(DefaultButtonViewModifier(backgroundColor: .orange))
    .font(.headline)

  Text("Hello, world")
    .withDefaultButtonFormatting(backgroundColor: .green)
    .font(.subheadline)

  // ViewModifier -> Extension 사용
  Text("Hello!!")
    .withDefaultButtonFormatting()
    .font(.title)

} //: VSTACK
}
}

// MARK: -  EXTENSION
extension View {
func withDefaultButtonFormatting(backgroundColor: Color = .blue)-> some View {
modifier(DefaultButtonViewModifier(backgroundColor: backgroundColor))
}
}Especially in more advanced production apps you actually want to customize
import SwiftUI

// MARK: -  VIEW
struct ButtonStyleBootCamp: View {
// MARK: -  PROPERTY
// MARK: -  BODY
var body: some View {
Button {

} label: {
  Text("Click me")
    .font(.headline)
    .foregroundColor(.white)
    .frame(height: 55)
    .frame(maxWidth: .infinity)
    .background(Color.blue.cornerRadius(10))
    .shadow(color: Color.blue.opacity(0.3), radius: 10, x: 0.0, y: 10.0)
}
// .buttonStyle(PlainButtonStyle())
// .buttonStyle(PressableStyle())
.withPressableStyle()
.padding(40)
}
}

// MARK: -  VIEWMODIFIER
struct PressableStyle: ButtonStyle {

let scaledAmount: CGFloat

// set default scaleAmount
init(scaledAmount: CGFloat) {
self.scaledAmount = scaledAmount
}

func makeBody(configuration: Configuration) -> some View {
configuration.label
  .scaleEffect(configuration.isPressed ? scaledAmount : 1.0)
  .opacity(configuration.isPressed ? 0.9 : 1.0)
  .brightness(configuration.isPressed ? 0.05 : 0)
}
}

// MARK: -  EXTENSTION
extension View {
func withPressableStyle(scaledAmount: CGFloat = 0.9) -> some View {
self.buttonStyle(PressableStyle(scaledAmount: scaledAmount))
}
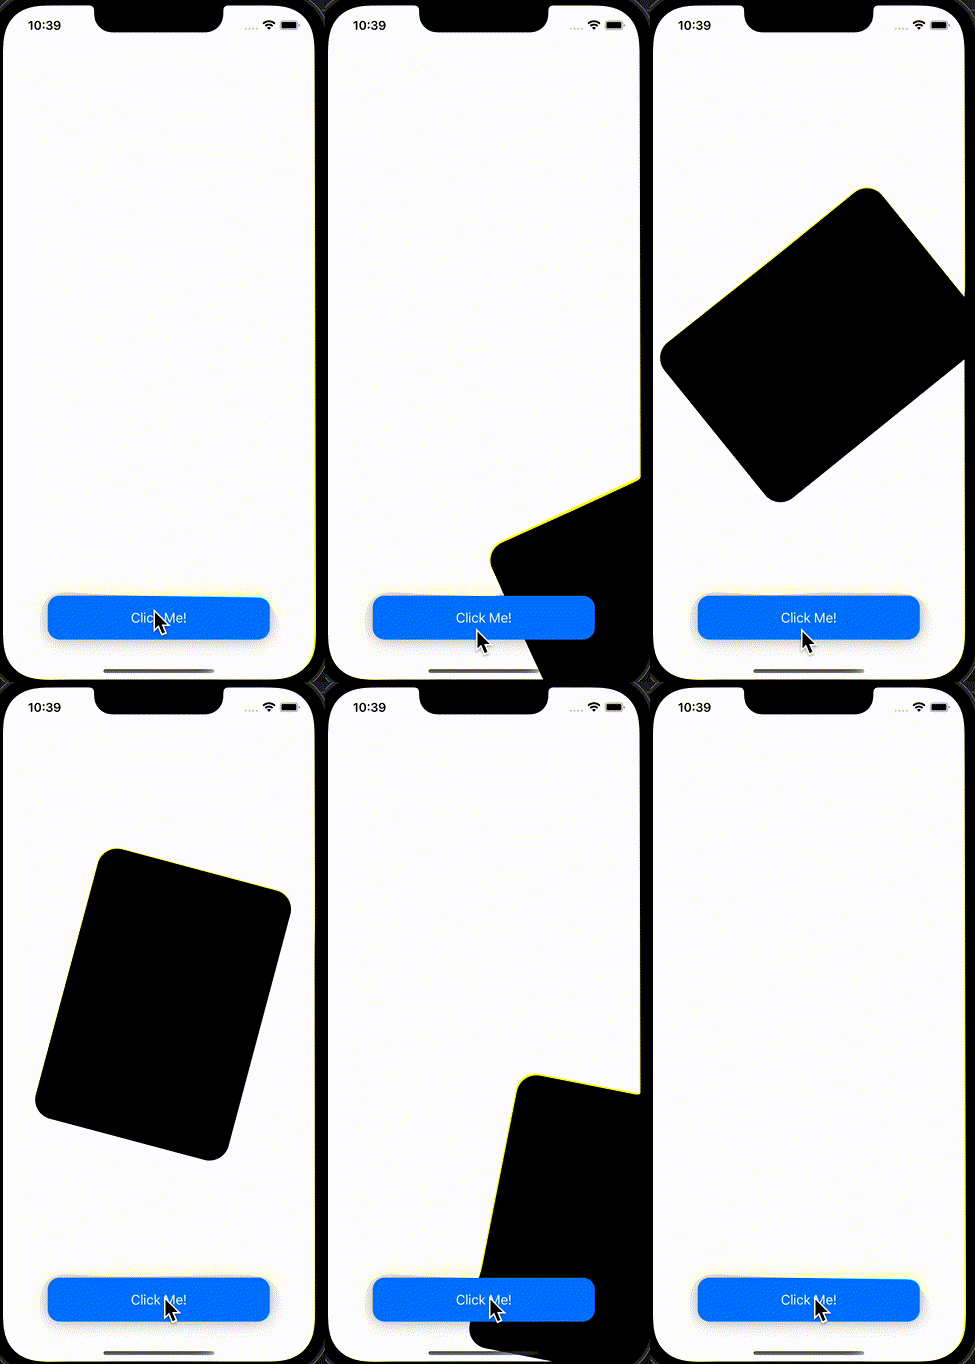
}You are going to want to add some custom animations and transitions and really customize how things come on and off of the screen to really create a beautiful user experience. You can actually totally customize and create your transitions.
import SwiftUI

// MARK: -  VIEW
struct AnyTransitionBootCamp: View {
// MARK: -  PROPERTY
@State private var showRectangle: Bool = false
// MARK: -  BODY
var body: some View {
VStack {
Spacer()

if showRectangle {
  RoundedRectangle(cornerRadius: 25)
    .frame(width: 250, height: 350)
    .frame(maxWidth: .infinity, maxHeight: .infinity)
    .transition(.rotaing(rotation: 1080))
}

Spacer()
Text("Click Me!")
  .withDefaultButtonFormatting()
  .padding(.horizontal, 40)
  .onTapGesture {
    withAnimation(.easeInOut(duration: 3.0)) {
      showRectangle.toggle()
    }
  }
} //: VSTACK
}
}

// MARK: -  VIEWMODIFIER
struct RotateViewModifier: ViewModifier {
let rotation: Double
func body(content: Content) -> some View {
  content
    .rotationEffect(Angle(degrees: rotation))
    .offset(
      x: rotation != 0 ? UIScreen.main.bounds.width : 0,
      y: rotation != 0 ? UIScreen.main.bounds.height : 0)
}
}

// MARK: -  EXTENSION
extension AnyTransition {
static var rotaing: AnyTransition {
  return AnyTransition.modifier(
    active: RotateViewModifier(rotation: 180),
    identity: RotateViewModifier(rotation: 0))
}

static func rotaing(rotation: Double) -> AnyTransition {
  return AnyTransition.modifier(
    active: RotateViewModifier(rotation: rotation),
    identity: RotateViewModifier(rotation: 0))
}
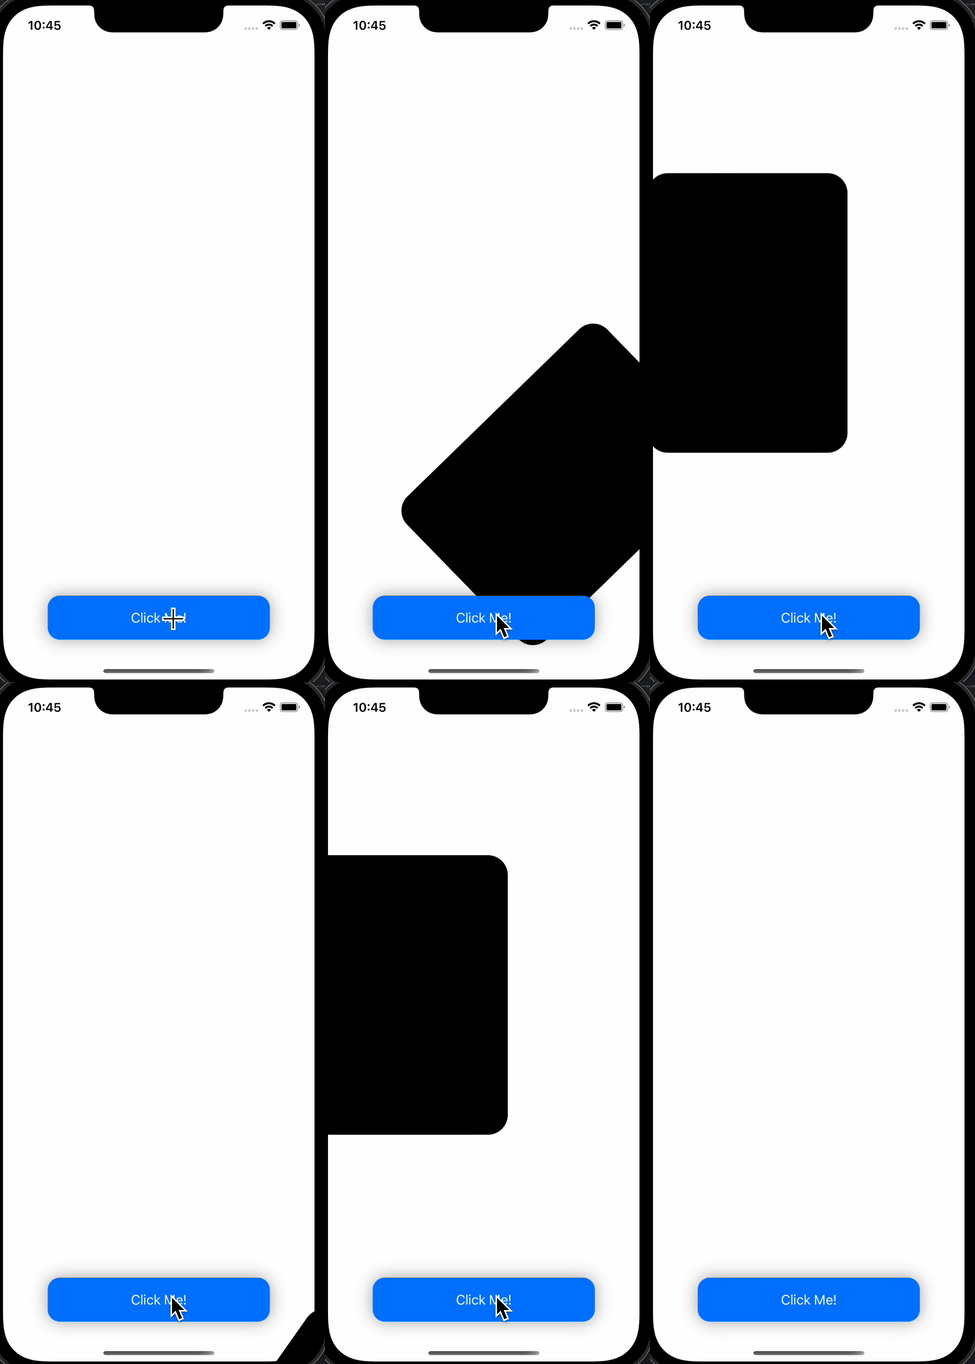
}- AnyTransition.asymmetric (insertion, removal)
import SwiftUI

// MARK: -  VIEW
struct AnyTransitionBootCamp: View {
// MARK: -  PROPERTY
@State private var showRectangle: Bool = false
// MARK: -  BODY
var body: some View {
VStack {
Spacer()

if showRectangle {
  RoundedRectangle(cornerRadius: 25)
    .frame(width: 250, height: 350)
    .frame(maxWidth: .infinity, maxHeight: .infinity)
    .transition(.rotateOn)
}

Spacer()
Text("Click Me!")
  .withDefaultButtonFormatting()
  .padding(.horizontal, 40)
  .onTapGesture {
    withAnimation(.easeInOut) {
      showRectangle.toggle()
    }
  }
} //: VSTACK
}
}

// MARK: -  VIEWMODIFIER
struct RotateViewModifier: ViewModifier {
let rotation: Double
func body(content: Content) -> some View {
content
  .rotationEffect(Angle(degrees: rotation))
  .offset(
    x: rotation != 0 ? UIScreen.main.bounds.width : 0,
    y: rotation != 0 ? UIScreen.main.bounds.height : 0)
}
}

// MARK: -  EXTENSTION
extension AnyTransition {
static var rotaing: AnyTransition {
modifier(
  active: RotateViewModifier(rotation: 180),
  identity: RotateViewModifier(rotation: 0))
}

static func rotaing(rotation: Double) -> AnyTransition {
modifier(
  active: RotateViewModifier(rotation: rotation),
  identity: RotateViewModifier(rotation: 0))
}

static var rotateOn: AnyTransition {
asymmetric(
  insertion: .rotaing,
  removal: .move(edge: .leading))
}
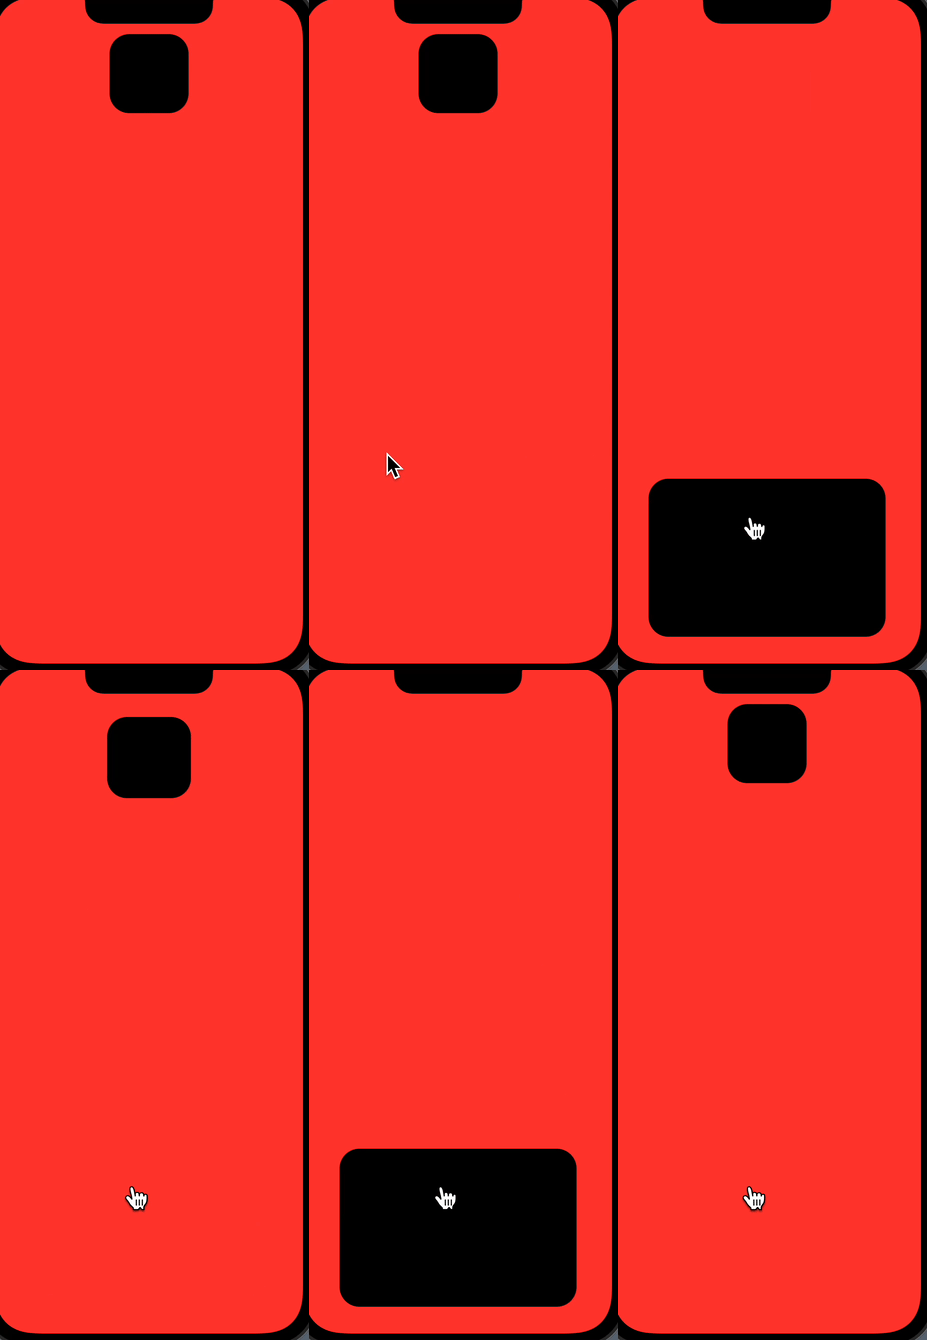
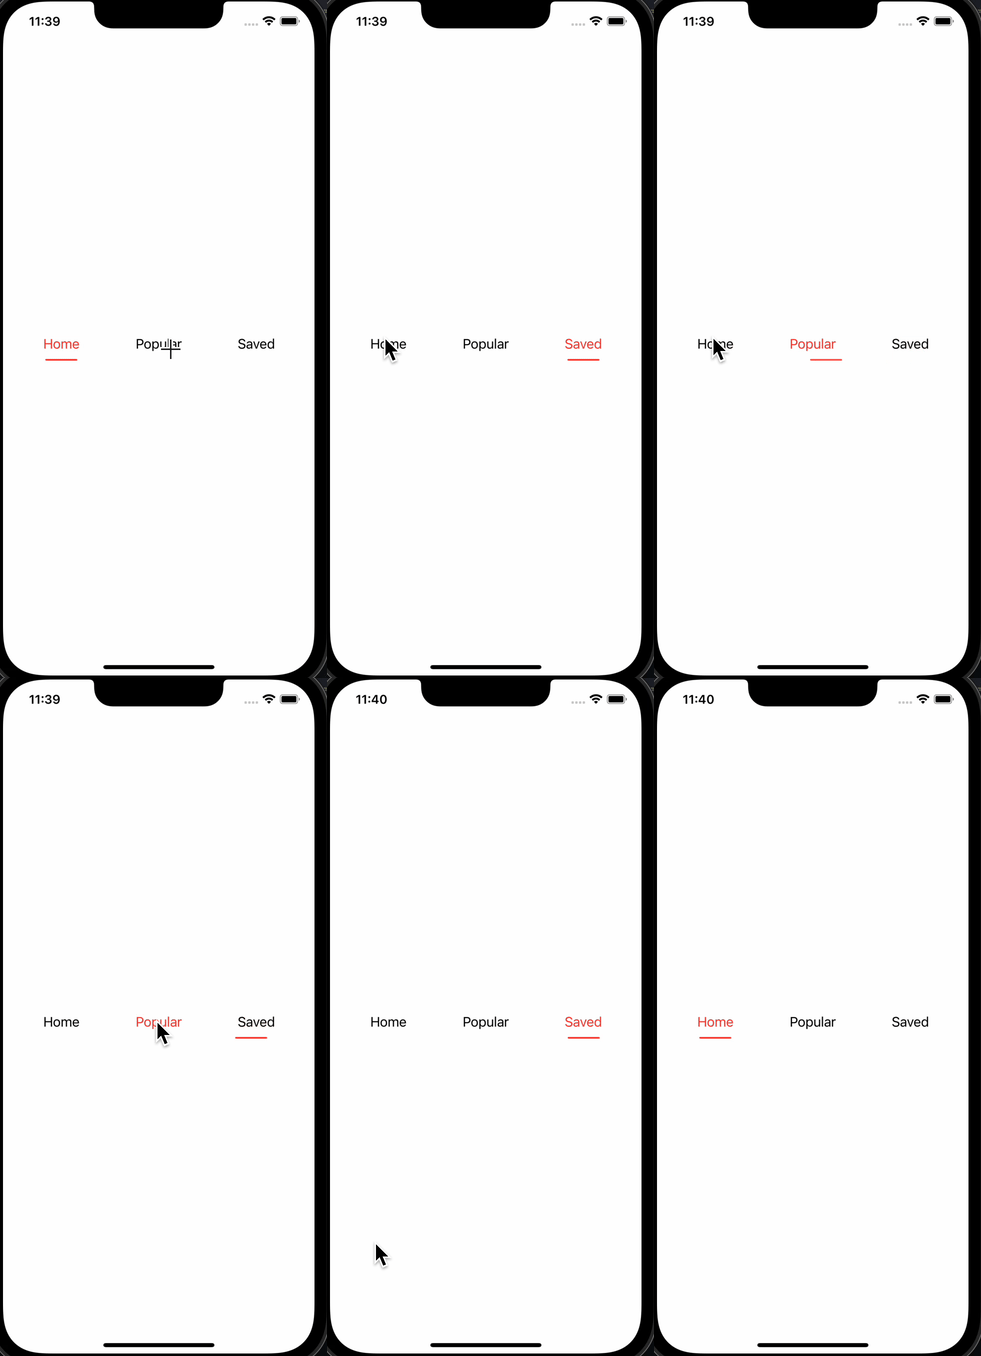
}The matchedGeometryEffect allows us to animate geometric shapes on the screen and specifically allows us to more on shape into another shape. So how we do it is actually create two different shapes on the screen and then we tell the system that these two shapes are the same shape
struct MatchedGeometryEffectBootCamp: View {
// MARK: -  PROPERTY
@State private var isClicked: Bool = false
@Namespace private var namespace
// MARK: -  BODY
var body: some View {
VStack {
if !isClicked {
  RoundedRectangle(cornerRadius: 25.0)
    .matchedGeometryEffect(id: "rectangle", in: namespace)
    .frame(width: 100, height: 100)
}

Spacer()
if isClicked {
  RoundedRectangle(cornerRadius: 25.0)
    .matchedGeometryEffect(id: "rectangle", in: namespace)
    .frame(width: 300, height: 200)
}

} //: VSTACK
.frame(maxWidth: .infinity, maxHeight: .infinity)
.background(Color.red)
.onTapGesture {
withAnimation(.easeInOut) {
  isClicked.toggle()
}
}
}
}
struct MatchedGeometryEffectExample2: View {
let categories: [String] = ["Home", "Popular", "Saved"]
@State private var selected: String = "Home"
@Namespace private var namespace2
var body: some View {
HStack {
ForEach(categories, id: \.self) { category in
ZStack {
if selected == category {
RoundedRectangle(cornerRadius: 10.0)
.fill(Color.red)
.matchedGeometryEffect(id: "category_background", in: namespace2)
.frame(width: 40, height: 2)
.offset(y: 20)
}
Text(category)
.foregroundColor(selected == category ? .red : .black)
}
.frame(maxWidth: .infinity)
.frame(height: 55)
.onTapGesture {
withAnimation(.spring()) {
selected = category
}
}
} //: LOOP
} //: HSTACK
.padding()
}
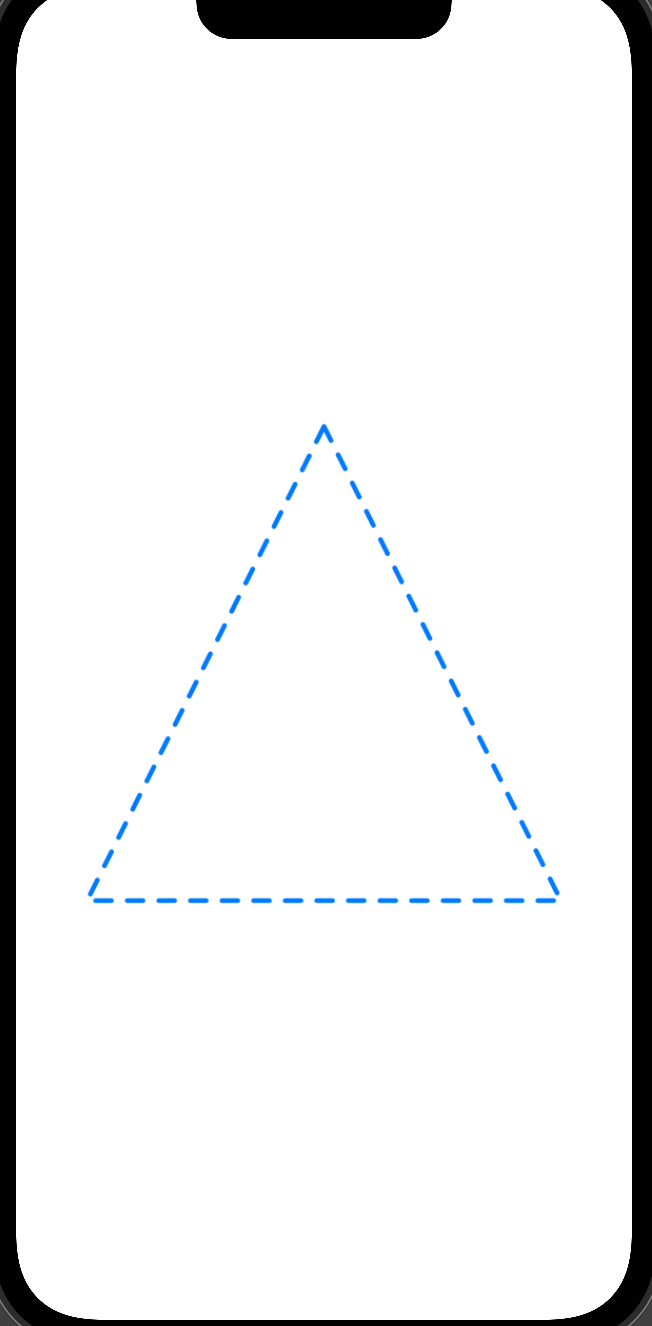
}By default SwiftUI actually comes with a bunch of shapes out of the box like rectangles rounded rectangles circles. By building custom and unique UI designs eventually you'll run into a point where actually need a custom shape.
SwiftUI by actually drawing the shape from point to point on a path
// MARK: -  VIEW
struct CustomShapesBootCamp: View {
// MARK: -  PROPERTY
// MARK: -  BODY
var body: some View {
ZStack {
  Triangle()
    // .fill(LinearGradient(gradient: Gradient(colors: [Color.red, Color.blue]), startPoint: .leading, endPoint: .trailing))
    // .trim(from: 0, to: 0.5)
    .stroke(style: StrokeStyle(lineWidth: 3, lineCap: .round, dash: [10]))
    .foregroundColor(.blue)
    .frame(width: 300, height: 300)
} //: ZSTACK
}
}

// MARK: -  CUSTOM SHAPE
struct Triangle: Shape {

func path(in rect: CGRect) -> Path {
Path { path in
  path.move(to: CGPoint(x: rect.midX, y: rect.minY)) // Set Starting point
  path.addLine(to: CGPoint(x: rect.maxX, y: rect.maxY))
  path.addLine(to: CGPoint(x: rect.minX, y: rect.maxY))
  path.addLine(to: CGPoint(x: rect.midX, y: rect.minY))
}
}
}
// MARK: - VIEW
struct CustomShapesBootCamp: View {
// MARK: - PROPERTY
// MARK: - BODY
var body: some View {
ZStack {
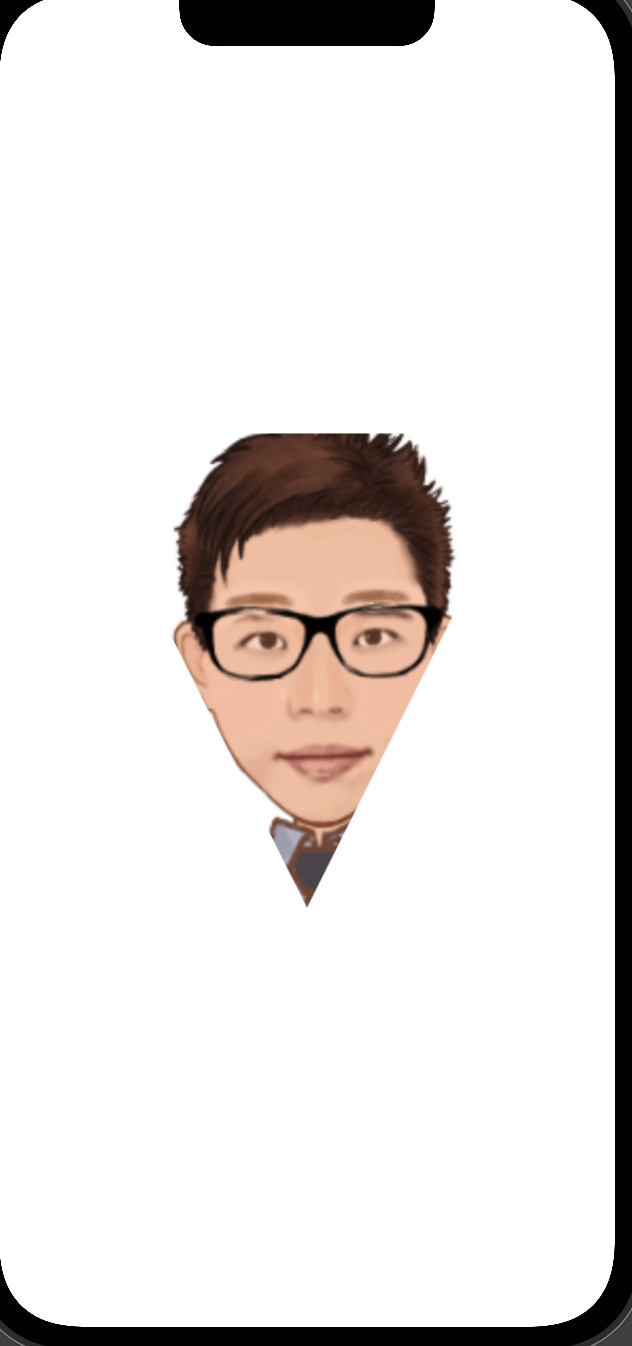
Image("pic")
.resizable()
.scaledToFill()
.frame(width: 300, height: 300)
.clipShape(
Triangle()
.rotation(Angle(degrees: 180))
)
} //: ZSTACK
}
}
// MARK: - CUSTOM SHAPE
struct Triangle: Shape {
func path(in rect: CGRect) -> Path {
Path { path in
path.move(to: CGPoint(x: rect.midX, y: rect.minY)) // Set Starting point
path.addLine(to: CGPoint(x: rect.maxX, y: rect.maxY))
path.addLine(to: CGPoint(x: rect.minX, y: rect.maxY))
path.addLine(to: CGPoint(x: rect.midX, y: rect.minY))
}
}
}// MARK: - VIEW
struct CustomShapesBootCamp: View {
// MARK: - PROPERTY
// MARK: - BODY
var body: some View {
ZStack {
Diamond()
.frame(width: 300, height: 300)
} //: ZSTACK
}
}
// MARK: - CUSTOM SHAPE
struct Diamond: Shape {
func path(in rect: CGRect) -> Path {
Path { path in
let horizontalOffset: CGFloat = rect.width * 0.2
path.move(to: CGPoint(x: rect.midX, y: rect.minY))
path.addLine(to: CGPoint(x: rect.maxX - horizontalOffset, y: rect.midY))
path.addLine(to: CGPoint(x: rect.midX, y: rect.maxY))
path.addLine(to: CGPoint(x: rect.minX + horizontalOffset, y: rect.midY))
path.addLine(to: CGPoint(x: rect.midX, y: rect.minY))
}
}
}// MARK: - VIEW
struct CustomShapesBootCamp: View {
// MARK: - PROPERTY
// MARK: - BODY
var body: some View {
ZStack {
Trapezoid()
.frame(width: 300, height: 150)
} //: ZSTACK
}
}
// MARK: - CUSTOM SHAPE
struct Trapezoid: Shape {
func path(in rect: CGRect) -> Path {
Path { path in
let horizontalOffset: CGFloat = rect.width * 0.2
path.move(to: CGPoint(x: rect.minX + horizontalOffset, y: rect.minY ))
path.addLine(to: CGPoint(x: rect.maxX - horizontalOffset, y: rect.minY))
path.addLine(to: CGPoint(x: rect.maxX, y: rect.maxY))
path.addLine(to: CGPoint(x: rect.minX, y: rect.maxY))
path.addLine(to: CGPoint(x: rect.minX + horizontalOffset, y: rect.minY))
}
}
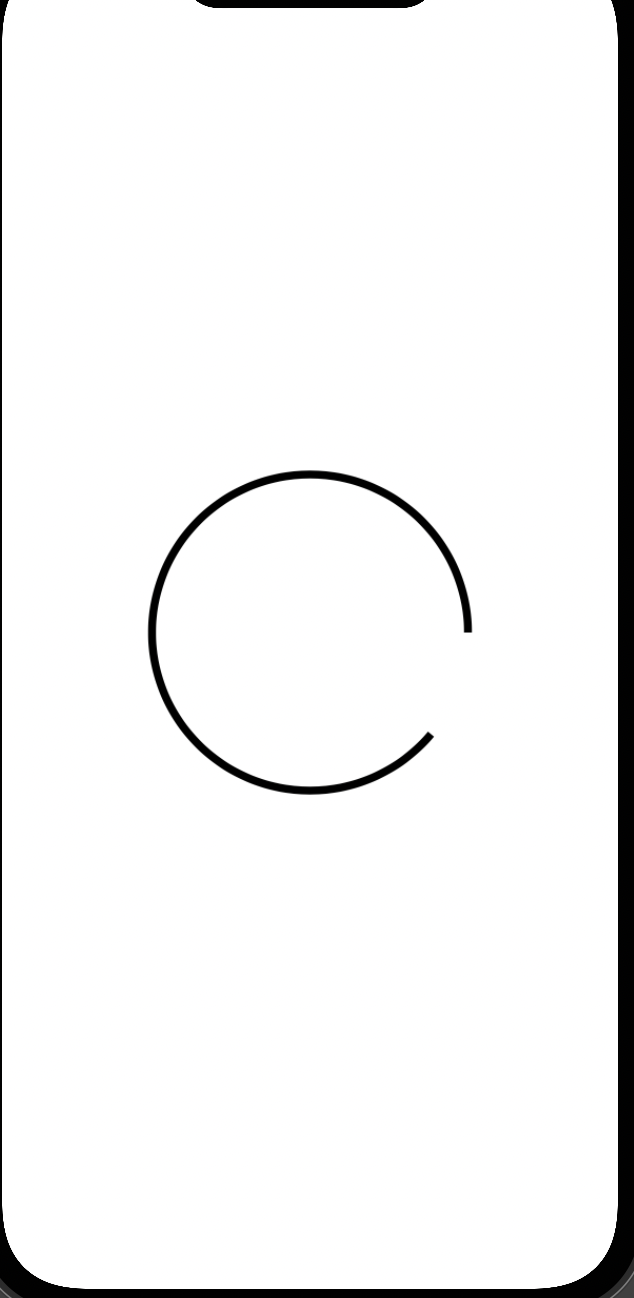
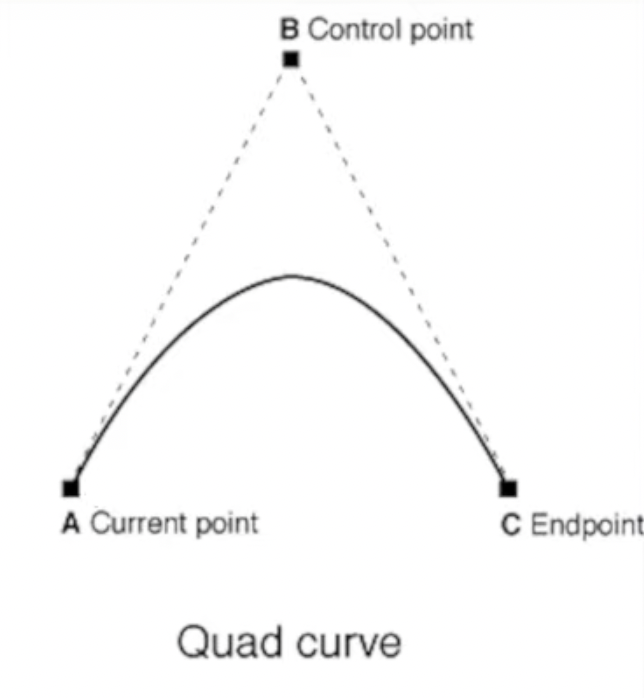
}Curves and arcs could be a little tricky to implement. To do that, arcs which is basically just a regular symmetrical curve and then quad curves which are a little more advanced and possibly more useful because they can connect two points and create an automatic curve between those two points
/ MARK: -  VIEW
struct CustomCurvesBootCamp: View {
// MARK: -  PROPERTY

// MARK: -  BODY
var body: some View {
  ArcSample()
    .stroke(lineWidth: 5)
    .frame(width: 200, height: 200)
}
}

// MARK: -  PREVIEW
struct CustomCurvesBootCamp_Previews: PreviewProvider {
static var previews: some View {
  CustomCurvesBootCamp()
}
}

// MARK: -  CUSTOM SHAPE
struct ArcSample: Shape {
func path(in rect: CGRect) -> Path {
Path { path in
  path.move(to: CGPoint(x: rect.maxX, y: rect.midY))
  path.addArc(
    center: CGPoint(x: rect.midX, y: rect.midY),
    radius: rect.height / 2,
    startAngle: Angle(degrees: 0),
    endAngle: Angle(degrees: 40),
    clockwise: true)
}
}
}
// MARK: - VIEW
struct CustomCurvesBootCamp: View {
// MARK: - PROPERTY
// MARK: - BODY
var body: some View {
ShapeWithArc()
.frame(width: 200, height: 200)
// .rotationEffect(Angle(degrees: 90))
}
}
// MARK: - PREVIEW
struct CustomCurvesBootCamp_Previews: PreviewProvider {
static var previews: some View {
CustomCurvesBootCamp()
}
}
// MARK: - CUSTOM SHAPE
struct ShapeWithArc: Shape {
func path(in rect: CGRect) -> Path {
Path { path in
// top left
path.move(to: CGPoint(x: rect.minX, y: rect.minY))
// top right
path.addLine(to: CGPoint(x: rect.maxX, y: rect.minY))
// mid right
path.addLine(to: CGPoint(x: rect.maxX, y: rect.midY))
// bottom
// path.addLine(to: CGPoint(x: rect.midX, y: rect.maxY))
path.addArc(
center: CGPoint(x: rect.midX, y: rect.midY),
radius: rect.height / 2,
startAngle: Angle(degrees: 0),
endAngle: Angle(degrees: 180),
clockwise: false)
// mid left
path.addLine(to: CGPoint(x: rect.minX, y: rect.midY))
}
}
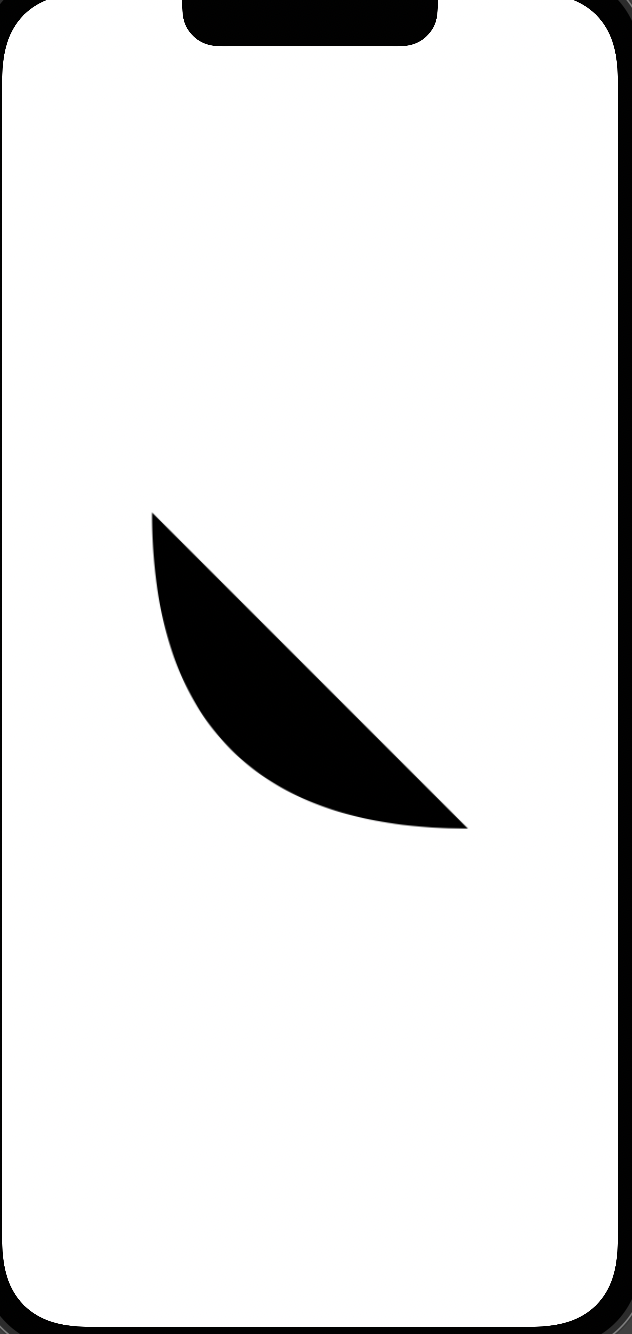
}- Quad curve
// MARK: -  VIEW
struct CustomCurvesBootCamp: View {
// MARK: -  PROPERTY

// MARK: -  BODY
var body: some View {
  QuadSample()
    .frame(width: 200, height: 200)
}
}

// MARK: -  PREVIEW
struct CustomCurvesBootCamp_Previews: PreviewProvider {
static var previews: some View {
  CustomCurvesBootCamp()
}
}

// MARK: -  CUSTOM SHAPE
struct QuadSample: Shape {
func path(in rect: CGRect) -> Path {
Path { path in
  path.move(to: .zero)
  path.addQuadCurve(
    to: CGPoint(x: rect.maxX, y: rect.maxY),
    control: CGPoint(x: rect.minX, y: rect.maxY))
}
}
}
// MARK: - VIEW
struct CustomCurvesBootCamp: View {
// MARK: - PROPERTY
// MARK: - BODY
var body: some View {
WaterShape()
.fill(LinearGradient(
gradient: Gradient(colors: [Color.blue, Color.cyan]),
startPoint: .topTrailing,
endPoint: .bottomTrailing))
.ignoresSafeArea()
}
}
// MARK: - PREVIEW
struct CustomCurvesBootCamp_Previews: PreviewProvider {
static var previews: some View {
CustomCurvesBootCamp()
}
}
// MARK: - CUSTOM SHAPE
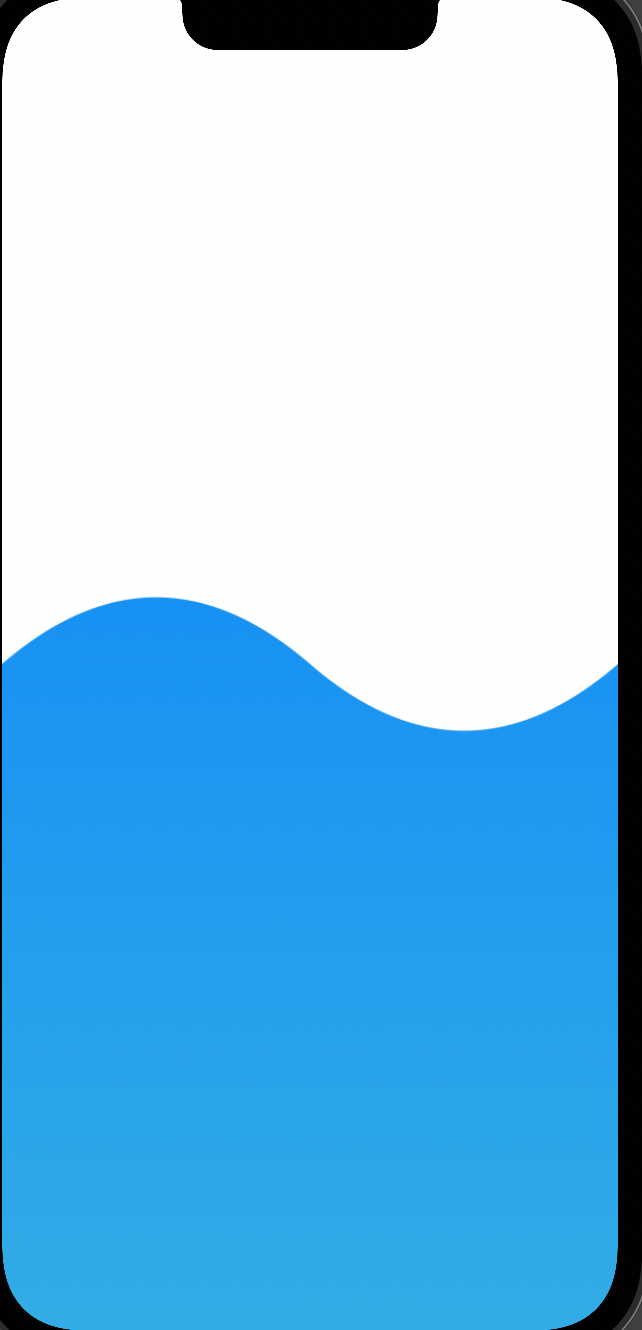
struct WaterShape: Shape {
func path(in rect: CGRect) -> Path {
Path { path in
path.move(to: CGPoint(x: rect.minX, y: rect.midY))
path.addQuadCurve(
to: CGPoint(x: rect.midX, y: rect.midY),
control: CGPoint(x: rect.width * 0.25, y: rect.height * 0.40))
path.addQuadCurve(
to: CGPoint(x: rect.maxX, y: rect.midY),
control: CGPoint(x: rect.width * 0.75, y: rect.height * 0.60))
path.addLine(to: CGPoint(x: rect.maxX, y: rect.maxY))
path.addLine(to: CGPoint(x: rect.minX, y: rect.maxY))
}
}
}// MARK: - VIEW
struct AnimatableDataBootCamp: View {
// MARK: - PROPERTY
@State private var animate: Bool = false
// MARK: - BODY
var body: some View {
ZStack {
// RoundedRectangle(cornerRadius: animate ? 60 : 0)
RectangleWithSingleCornerAnimation(cornerRadius: animate ? 60 : 0)
.frame(width: 250, height: 250)
} //: ZSTACK
.onAppear {
withAnimation(Animation.linear(duration: 2.0).repeatForever()) {
animate.toggle()
}
}
}
}
// MARK: - PREVIEW
struct AnimatableDataBootCamp_Previews: PreviewProvider {
static var previews: some View {
AnimatableDataBootCamp()
}
}
// MARK: - CUSTOM SHAPE
struct RectangleWithSingleCornerAnimation: Shape {
var cornerRadius: CGFloat
var animatableData: CGFloat {
get { cornerRadius }
set { cornerRadius = newValue }
}
func path(in rect: CGRect) -> Path {
Path { path in
path.move(to: .zero)
path.addLine(to: CGPoint(x: rect.maxX, y: rect.minY))
path.addLine(to: CGPoint(x: rect.maxX, y: rect.maxY - cornerRadius))
path.addArc(
center: CGPoint(x: rect.maxX - cornerRadius, y: rect.maxY - cornerRadius),
radius: cornerRadius,
startAngle: Angle(degrees: 0),
endAngle: Angle(degrees: 360),
clockwise: false)
path.addLine(to: CGPoint(x: rect.maxX - cornerRadius, y: rect.maxY ))
path.addLine(to: CGPoint(x: rect.minX, y: rect.maxY))
}
}
}// MARK: - VIEW
struct AnimatableDataBootCamp: View {
// MARK: - PROPERTY
@State private var animate: Bool = false
// MARK: - BODY
var body: some View {
ZStack {
Pacman(offsetAmount: animate ? 20 : 0)
.frame(width: 250, height: 250)
} //: ZSTACK
.onAppear {
withAnimation(Animation.easeInOut.repeatForever()) {
animate.toggle()
}
}
}
}
// MARK: - PREVIEW
struct AnimatableDataBootCamp_Previews: PreviewProvider {
static var previews: some View {
AnimatableDataBootCamp()
}
}
// MARK: - CUSTOM SHAPE
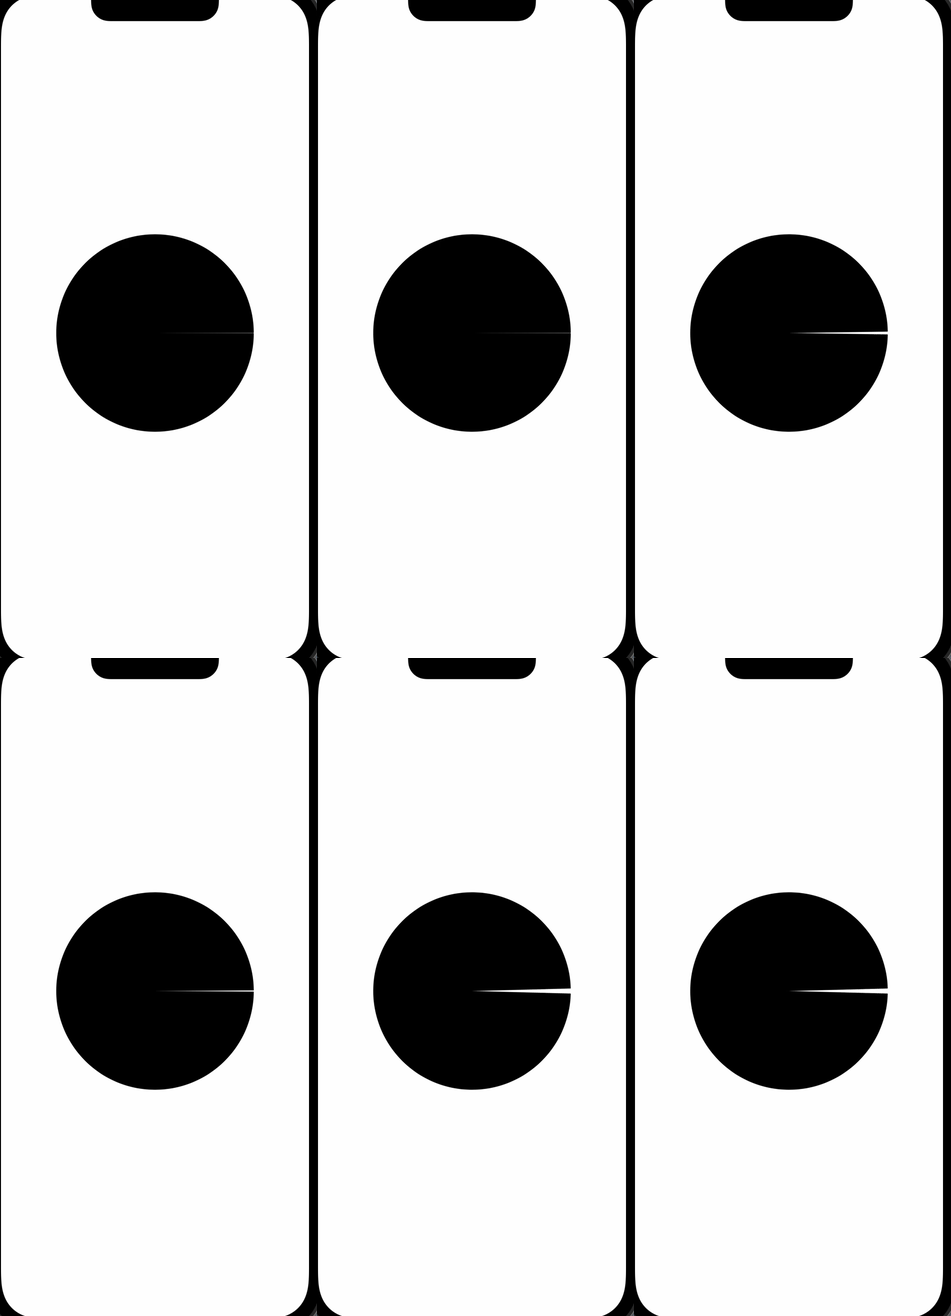
struct Pacman: Shape {
var offsetAmount: Double
var animatableData: Double {
get { offsetAmount }
set { offsetAmount = newValue }
}
func path(in rect: CGRect) -> Path {
Path { path in
path.move(to: CGPoint(x: rect.midX, y: rect.midY))
path.addArc(
center: CGPoint(x: rect.midX, y: rect.midY),
radius: rect.height / 2,
startAngle: Angle(degrees: offsetAmount),
endAngle: Angle(degrees: 360 - offsetAmount),
clockwise: false)
}
}
}// MARK: - MODEL
struct StringModel {
let info: String?
func removeInfo() -> StringModel {
StringModel(info: nil)
}
}
// generic any type
struct GenericModel<T> {
let info: T?
func removeInfo() -> GenericModel {
GenericModel(info: nil)
}
}
// MARK: - VIEWMODEL
class GenericsViewModel: ObservableObject {
// MARK: - PROPERTY
@Published var stringModel = StringModel(info: "Hi World!")
@Published var genericStringModel = GenericModel(info: "Hello, world")
@Published var genericBoolModel = GenericModel(info: true)
// MARK: - INIT
// MARK: - FUNCTION
func removeData() {
stringModel = stringModel.removeInfo()
genericStringModel = genericStringModel.removeInfo()
genericBoolModel = genericBoolModel.removeInfo()
}
}
// MARK: - VIEW
struct GenericsBootCamp: View {
// MARK: - PROPERTY
@StateObject private var vm = GenericsViewModel()
// MARK: - BODY
var body: some View {
VStack {
GenericView(content: Text("custom content"), title: "new View")
Text(vm.stringModel.info ?? "No data")
Text(vm.genericStringModel.info ?? "No data")
Text(vm.genericBoolModel.info?.description ?? "No data")
.onTapGesture {
vm.removeData()
}
} //: VSTACK
}
}
struct GenericView<T:View>: View {
let content: T
let title: String
var body: some View {
VStack {
Text(title)
content
}
}
}We can use a view builder to create closures in which we can create custom child views. In order to use the view builder and get the most out of it we actually use the view builder alongside generic types
import SwiftUI

// MARK: -  VIEW
struct ViewBuilderBootCamp: View {
// MARK: -  PROPERTY

// MARK: -  BODY
var body: some View {
  VStack {
    HeaderViewRegular(title: "New Title", description: "Hello", iconName: "heart.fill")
    HeaderViewRegular(title: "Another Title", description: nil, iconName: nil)
    Spacer()
  } //: VSTACK
}
}

// MARK: -  EXTENSTION
struct HeaderViewRegular: View {
let title: String
let description: String?
let iconName: String?

var body: some View {
  VStack(alignment: .leading, spacing: 10) {
    Text(title)
      .font(.largeTitle)
      .fontWeight(.semibold)

    if let description = description {
      Text(description)
        .font(.callout)
    }
    if let iconName = iconName {
      Image(systemName: iconName)
    }

    RoundedRectangle(cornerRadius: 5)
      .frame(height: 2)

  } //: VSTACK
  .frame(maxWidth: .infinity, alignment: .leading)
  .padding()
}
}
Above method here is kind of getting annoying and not super efficient because we have custom logic for this description we've custom logic for this icon name what if we wanted to have 10 icons or more. So with this method we can actually just customize and add whatever we want into this view
If you want to be able to customize this view and put whatever we want inside of it we really need to pass a view into the view
To use @ViewBuilder to make customize aspects in Views
// MARK: -  VIEW
struct ViewBuilderBootCamp: View {
// MARK: -  PROPERTY

// MARK: -  BODY
var body: some View {
VStack {
HeaderViewRegular(title: "New Title", description: "Hello", iconName: "heart.fill")
HeaderViewRegular(title: "Another Title", description: nil, iconName: nil)

HeaderViewGeneric(title: "Generic Tilte") {
  HStack {
    Text("Hi")
    Image(systemName: "heart.fill")
  } //: HSTACK
}

CustomHStack {
  Text("Hi 1")
  Text("Hi 2")
}
HStack {
  Text("Hi 3")
  Text("Hi 4")
}
Spacer()
} //: VSTACK
}
}

// MARK: -  EXTENSTION
struct HeaderViewRegular: View {
let title: String
let description: String?
let iconName: String?

var body: some View {
VStack(alignment: .leading, spacing: 10) {
  Text(title)
    .font(.largeTitle)
    .fontWeight(.semibold)

  if let description = description {
    Text(description)
      .font(.callout)
  }
  if let iconName = iconName {
    Image(systemName: iconName)
  }

  RoundedRectangle(cornerRadius: 5)
    .frame(height: 2)

} //: VSTACK
.frame(maxWidth: .infinity, alignment: .leading)
.padding()
}
}

struct HeaderViewGeneric<Content:View>: View {

let title: String
let content: Content

init(title: String, @ViewBuilder content: () -> Content) {
self.title = title
self.content = content()
}

var body: some View {
VStack(alignment: .leading, spacing: 10) {
  Text(title)
    .font(.largeTitle)
    .fontWeight(.semibold)

  content

  // if let description = description {
  // 	Text(description)
  // 		.font(.callout)
  // }
  // if let iconName = iconName {
  // 	Image(systemName: iconName)
  // }
  //
  RoundedRectangle(cornerRadius: 5)
    .frame(height: 2)
} //: VSTACK
.frame(maxWidth: .infinity, alignment: .leading)
.padding()
}
}

struct CustomHStack<Content:View>: View {
let content: Content

init(@ViewBuilder content: () -> Content) {
  self.content = content()
}
var body: some View {
  HStack {
    content
  }
}
}
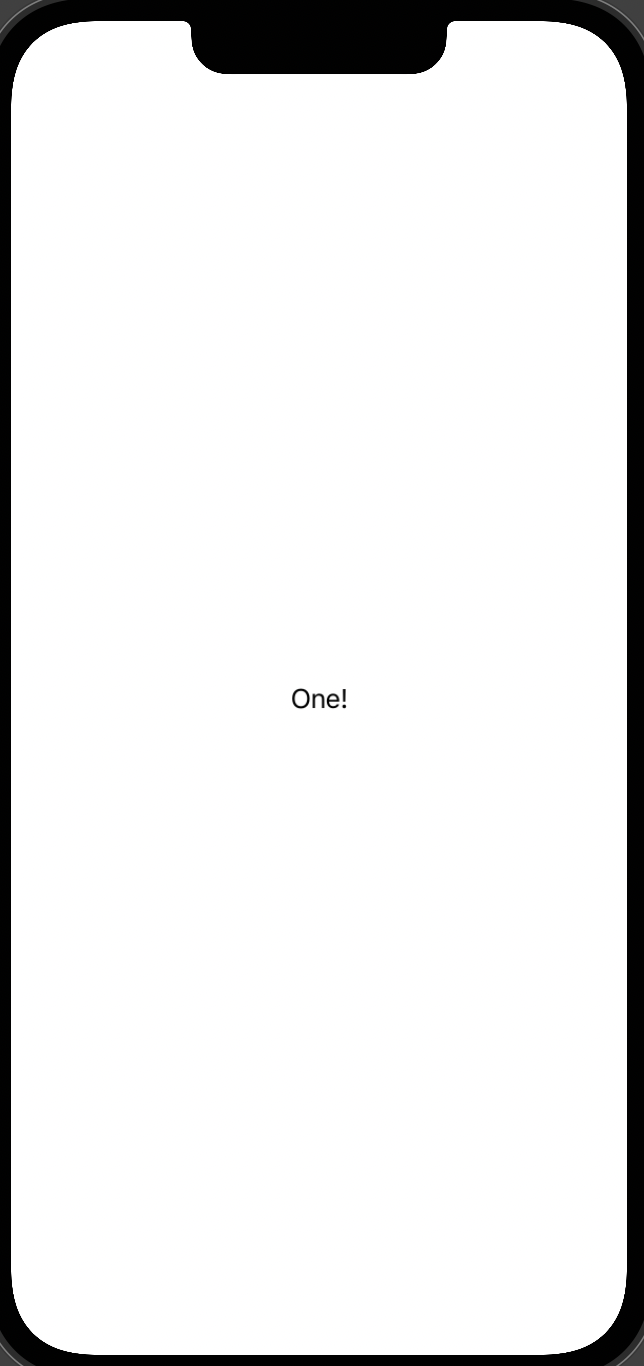
We can use @ViewBuilder instead of using it inside the init and we can actually just declare custom variables with the view builder attribute
struct LocalViewBuilder: View {
enum ViewType {
  case one, two, three
}
let type: ViewType

@ViewBuilder  private var headerSection: some View {
  switch type {
  case .one:
    viewOne
  case .two:
    viewTwo
  case .three:
    viewThree
  }
  // if type == .one {
  // 	viewOne
  // } else if type == .two {
  // 	viewTwo
  // } else if type == .three {
  // 	viewThree
  // }
}

private var viewOne: some View {
  Text("One!")
}
private var viewTwo: some View {
  VStack {
    Text("Two")
    Image(systemName: "heart.fill")
  }
}
private var viewThree: some View {
  Image(systemName: "heart.fill")
}
var body: some View {
  VStack {
    headerSection
  } //: VSTACK
}

}
/ MARK: -  PREVIEW
struct ViewBuilderBootCamp_Previews: PreviewProvider {
static var previews: some View {
  // ViewBuilderBootCamp()
  LocalViewBuilder(type: .one)
	}
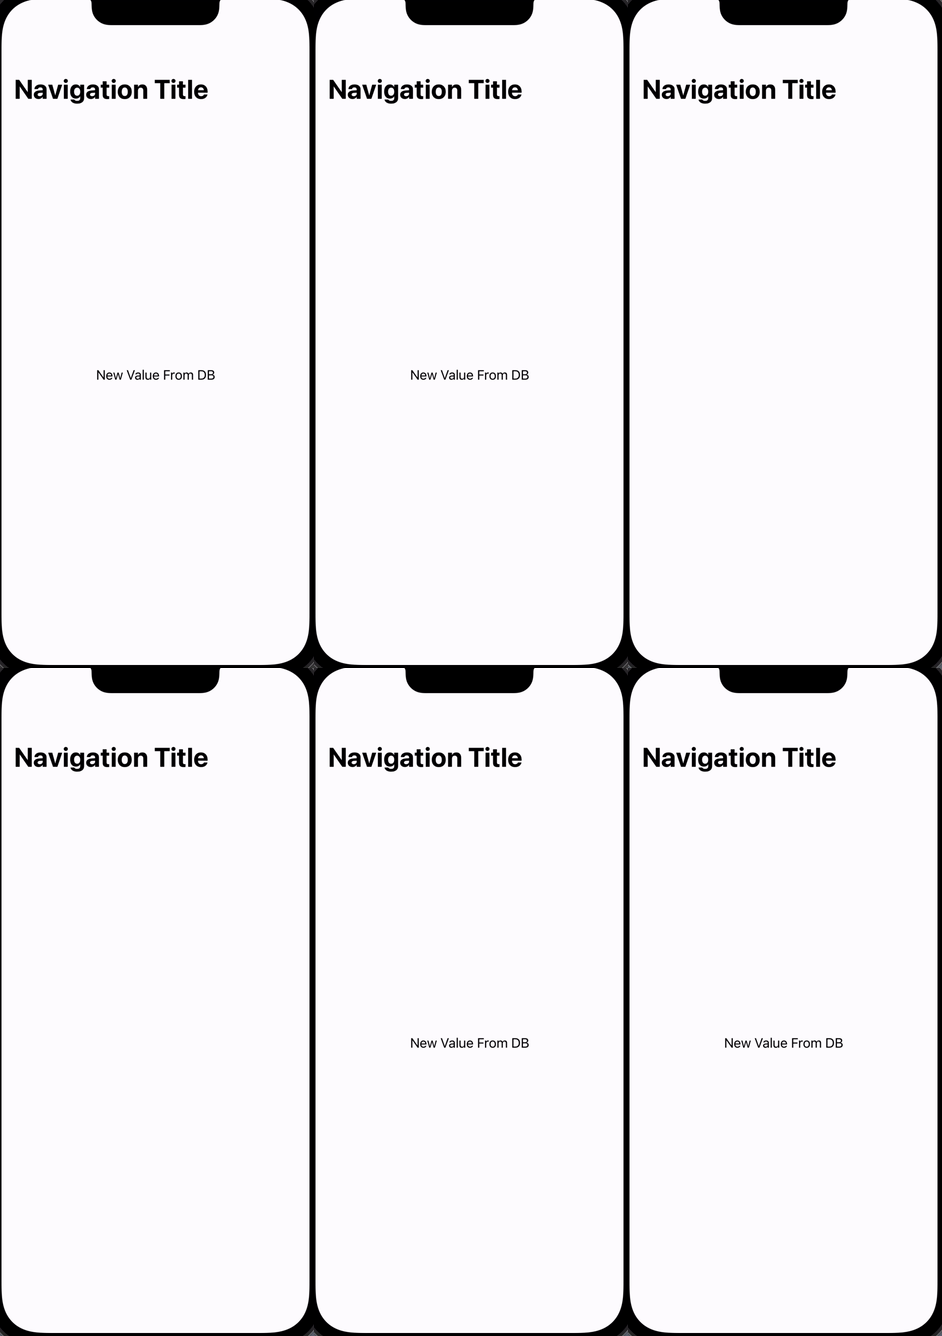
}Once, you start building custom SwiftUI components you will run into situations where the preference key will come in handy the most common example of a preference key is actually the title in the navigation bar
So, SwiftUI if you use the regular navigation view you probably set the title for that navigation view within the child view of that screen and what you may have realized is that when we are setting the title in a navigation view, we are actually updating the parent title from a child view
In SwiftUI, normally data flows from parent views down to child views and the only way we can get it to flow back is if we use a binding. But you probably noticed that when you're setting the title on a navigation view there is no binding we just set the title as a string and it updates the parent view and that's because behind the scenes it is using a preference key.
struct PreferenceKeyBootCamp: View {
// MARK: -  PROPERTY
@State  private var text: String = "Hellow world!"
// MARK: -  BODY
var body: some View {
NavigationView {
  VStack {
    SecondaryScreen(text: text)
      .navigationTitle("Navigation Title")

  } //: VSTACK
} //: NAVIGATION
.onPreferenceChange(CustomTiltePreferenceKey.self) { value in
  self.text = value
}
}
}

// MARK: -  PREVIEW
struct PreferenceKeyBootCamp_Previews: PreviewProvider {
static var previews: some View {
  PreferenceKeyBootCamp()
}
}

struct SecondaryScreen: View {
let text: String
@State private var newValue: String = ""

var body: some View {
Text(text)
  .onAppear(perform: getDataFromDatabase)
  .customTitle(newValue)
}

func getDataFromDatabase() {
// download fake data
DispatchQueue.main.asyncAfter(deadline: .now() + 2.0) {
  self.newValue = "New Value From DB"
}
}
}

extension View {
func customTitle(_ text: String) -> some View {
    preference(key: CustomTiltePreferenceKey.self, value: text)
}
}

struct CustomTiltePreferenceKey: PreferenceKey {

static var defaultValue: String = ""

static func reduce(value: inout String, nextValue: () -> String) {
  value = nextValue()
}
}
import SwiftUI
struct GeometryPreferenceBootCamp: View {
// MARK: - PROPERTY
@State private var rectSize: CGSize = .zero
// MARK: - BODY
var body: some View {
VStack(spacing: 50) {
Text("Hello")
.frame(width: rectSize.width, height: rectSize.height)
.background(Color.blue)
HStack {
Rectangle()
GeometryReader { geo in
Rectangle()
.updateRectangleGeoSize(geo.size)
}
Rectangle()
}
.frame(height: 55)
} //: VSTACK
.onPreferenceChange(RectangleGeometrySizePreferenceKey.self) { value in
self.rectSize = value
}
}
}
// MARK: - PREVIEW
struct GeometryPreferenceBootCamp_Previews: PreviewProvider {
static var previews: some View {
GeometryPreferenceBootCamp()
}
}
extension View {
func updateRectangleGeoSize(_ size: CGSize) -> some View {
preference(key: RectangleGeometrySizePreferenceKey.self, value: size)
}
}
struct RectangleGeometrySizePreferenceKey: PreferenceKey {
static var defaultValue: CGSize = .zero
static func reduce(value: inout CGSize, nextValue: () -> CGSize) {
value = nextValue()
}
}import SwiftUI
struct ScrollViewOffsetPreferenceKey: PreferenceKey {
static var defaultValue: CGFloat = 0
static func reduce(value: inout CGFloat, nextValue: () -> CGFloat) {
value = nextValue()
}
}
extension View {
func onScrollViewoffsetChnaged(action: @escaping (_ offset: CGFloat) -> Void) -> some View {
self
.background(
GeometryReader { geo in
Text("")
.preference(key: ScrollViewOffsetPreferenceKey.self, value: geo.frame(in: .global).minY)
}
)
.onPreferenceChange(ScrollViewOffsetPreferenceKey.self) { value in
action(value)
}
}
}
struct ScrollViewOffsetPreferenceBootCamp: View {
let title: String = "New title here!!!"
@State private var scrollViewOffset: CGFloat = 0
var body: some View {
ScrollView {
VStack {
titleLayer
.opacity(Double(scrollViewOffset) / 63.0)
.onScrollViewoffsetChnaged { value in
self.scrollViewOffset = value
}
contentLayer
} //: VSTACK
.padding()
} //: SCROLL
.overlay(Text("\(scrollViewOffset)"))
.overlay(
navBarLayer
.opacity(scrollViewOffset < 40 ? 1.0 : 0.0)
, alignment: .top
)
}
}
struct ScrollViewOffsetPreferenceBootCamp_Previews: PreviewProvider {
static var previews: some View {
ScrollViewOffsetPreferenceBootCamp()
}
}
extension ScrollViewOffsetPreferenceBootCamp {
private var titleLayer: some View {
Text(title)
.font(.largeTitle)
.fontWeight(.semibold)
.frame(maxWidth: .infinity, alignment: .leading)
}
private var contentLayer: some View {
ForEach(0..<100) { _ in
RoundedRectangle(cornerRadius: 10)
.fill(Color.red.opacity(0.3))
.frame(width: 300, height: 300)
} //: LOOP
}
private var navBarLayer: some View {
Text(title)
.font(.headline)
.frame(maxWidth: .infinity)
.frame(height: 55)
.background(Color.blue)
}
}There are majority of apps use either a tab bar or a navigation view and those two components in SwiftUI are not that customizable. Actually, model our custom tab view based off of apple's API for the default tab view
The majority of features in Custom TabView
-
Generics
-
ViewBuilder
-
PreferenceKey
-
MatchedGeometryEffect
// General style tabView
import SwiftUI

struct AppTabBarView: View {
// MARK: -  PROPERTY
@State private var selection: String = "home"
// MARK: -  BODY
var body: some View {
TabView(selection: $selection) {
Color.red
  .tabItem {
    Image(systemName: "house")
    Text("Home")
  }

Color.blue
  .tabItem {
    Image(systemName: "heart")
    Text("Favorite")
  }

Color.orange
  .tabItem {
    Image(systemName: "person")
    Text("Profile")
  }
}
}
}

// MARK: -  PREVIEW
struct AppTabBarView_Previews: PreviewProvider {
static var previews: some View {
  AppTabBarView()
}
}
// in TabBarItem
import Foundation
import SwiftUI
// struct TabBarItem: Hashable {
// let iconName: String
// let title: String
// let color: Color
// }
// Model is handy when you don't know the actual data tat you're going to get
// TabBar specifically we actually have all that data in our code
// We have all of the data already it will actually be easier to make this tab bar item and enum instead of struct
enum TabBarItem: Hashable {
case home, favorites, profile, messages
var iconName: String {
switch self {
case .home: return "house"
case .favorites: return "heart"
case .profile: return "person"
case .messages: return "message"
}
}
var title: String {
switch self {
case .home: return "Home"
case .favorites: return "Favorites"
case .profile: return "Profile"
case .messages: return "Messages"
}
}
var color: Color {
switch self {
case .home: return Color.red
case .favorites: return Color.blue
case .profile: return Color.green
case .messages: return Color.orange
}
}
}
// in TabBarItemsPreferenceKey
import Foundation
import SwiftUI

// MARK: -  Create PreferenceKey
struct TabBarItemsPreferenceKey: PreferenceKey {

static var defaultValue: [TabBarItem] = []

static func reduce(value: inout [TabBarItem], nextValue: () -> [TabBarItem]) {
  value += nextValue()
}
}

// MARK: -  ViewModifier
struct TabBarItemViewModifier: ViewModifier {

let tab: TabBarItem
@Binding var selection: TabBarItem

func body(content: Content) -> some View {
  content
    .opacity(selection == tab ? 1.0 : 0.0)
    .preference(key: TabBarItemsPreferenceKey.self, value: [tab])
}
}

// MARK: -  Extenstion
extension View {
func tabBarItem(tab: TabBarItem, selection: Binding<TabBarItem>) -> some View {
  self
    .modifier(TabBarItemViewModifier(tab: tab, selection: selection))
}
}
// in CustomTabBarContainerView
import SwiftUI
struct CustomTabBarContainerView<Content:View>: View {
@Binding var selection: TabBarItem
let content: Content
@State private var tabs: [TabBarItem] = []
init(selection: Binding<TabBarItem>, @ViewBuilder content: () -> Content) {
self._selection = selection
self.content = content()
}
var body: some View {
ZStack(alignment: .bottom) {
content
.ignoresSafeArea()
CustomTabBarView(tabs: tabs, selection: $selection, localSelection: selection)
} //: ZSTACK
.onPreferenceChange(TabBarItemsPreferenceKey.self) { value in
self.tabs = value
}
}
}
struct CustomTabBarContainerView_Previews: PreviewProvider {
static let tabs: [TabBarItem] = [
.home, .favorites, .profile, .messages
]
static var previews: some View {
CustomTabBarContainerView(selection: .constant(tabs.first!)) {
Color.red
}
}
}// in CustomTabBarView
import SwiftUI
// MARK: - VIEW
struct CustomTabBarView: View {
// MARK: - PROPERTY
let tabs: [TabBarItem]
@Binding var selection: TabBarItem
@Namespace private var namespace
@State var localSelection: TabBarItem
// MARK: - BODY
var body: some View {
// tabBarVersion1
tabBarVersion2
.onChange(of: selection) { newValue in
withAnimation(.easeInOut) {
localSelection = newValue
}
}
}
}
// MARK: - PREVIEW
struct CustomTabBarView_Previews: PreviewProvider {
static let tabs: [TabBarItem] = [
.home, .favorites, .profile
]
static var previews: some View {
VStack {
Spacer()
CustomTabBarView(tabs: tabs, selection: .constant(tabs.first!), localSelection: tabs.first!)
}
}
}
// MARK: - EXTENSTION
extension CustomTabBarView {
private func tabView(tab: TabBarItem) -> some View {
VStack {
Image(systemName: tab.iconName)
.font(.subheadline)
Text(tab.title)
.font(.system(size: 10, weight: .semibold, design: .rounded))
} //: VSTACK
.foregroundColor(selection == tab ? tab.color : Color.gray)
.padding(.vertical, 8)
.frame(maxWidth: .infinity)
.background(selection == tab ? tab.color.opacity(0.2) : Color.clear)
.cornerRadius(10)
}
private var tabBarVersion1: some View {
HStack {
ForEach(tabs, id: \.self) { tab in
tabView(tab: tab)
.onTapGesture {
switchToTab(tab: tab)
}
}
} //: HSTACK
.padding(6)
.background(Color.white.ignoresSafeArea(edges: .bottom))
}
private func switchToTab(tab: TabBarItem) {
selection = tab
}
}
// tabBarVersion2
extension CustomTabBarView {
private func tabView2(tab: TabBarItem) -> some View {
VStack {
Image(systemName: tab.iconName)
.font(.subheadline)
Text(tab.title)
.font(.system(size: 10, weight: .semibold, design: .rounded))
} //: VSTACK
.foregroundColor(localSelection == tab ? tab.color : Color.gray)
.padding(.vertical, 8)
.frame(maxWidth: .infinity)
.background(
ZStack {
if localSelection == tab {
RoundedRectangle(cornerRadius: 10)
.fill(tab.color.opacity(0.2))
.matchedGeometryEffect(id: "background_rectangle", in: namespace)
}
} //: ZSTACK
)
}
private var tabBarVersion2: some View {
HStack {
ForEach(tabs, id: \.self) { tab in
tabView2(tab: tab)
.onTapGesture {
switchToTab(tab: tab)
}
}
} //: HSTACK
.padding(6)
.background(Color.white.ignoresSafeArea(edges: .bottom))
.cornerRadius(10)
.shadow(color: Color.black.opacity(0.3), radius: 10, x: 0, y: 5)
.padding(.horizontal)
}
}import SwiftUI
struct AppTabBarView: View {
// MARK: - PROPERTY
@State private var selection: String = "home"
@State private var tabSelection: TabBarItem = .home
// MARK: - BODY
var body: some View {
CustomTabBarContainerView(selection: $tabSelection) {
Color.blue
.tabBarItem(tab: .home, selection: $tabSelection)
Color.red
.tabBarItem(tab: .favorites, selection: $tabSelection)
Color.green
.tabBarItem(tab: .profile, selection: $tabSelection)
Color.orange
.tabBarItem(tab: .messages, selection: $tabSelection)
}
}
}
// MARK: - PREVIEW
struct AppTabBarView_Previews: PreviewProvider {
static var previews: some View {
AppTabBarView()
}
}
// MARK: - EXTENSTION
extension AppTabBarView {
private var defaultTabView: some View {
TabView(selection: $selection) {
Color.red
.tabItem {
Image(systemName: "house")
Text("Home")
}
Color.blue
.tabItem {
Image(systemName: "heart")
Text("Favorite")
}
Color.orange
.tabItem {
Image(systemName: "person")
Text("Profile")
}
} //: TAB
}
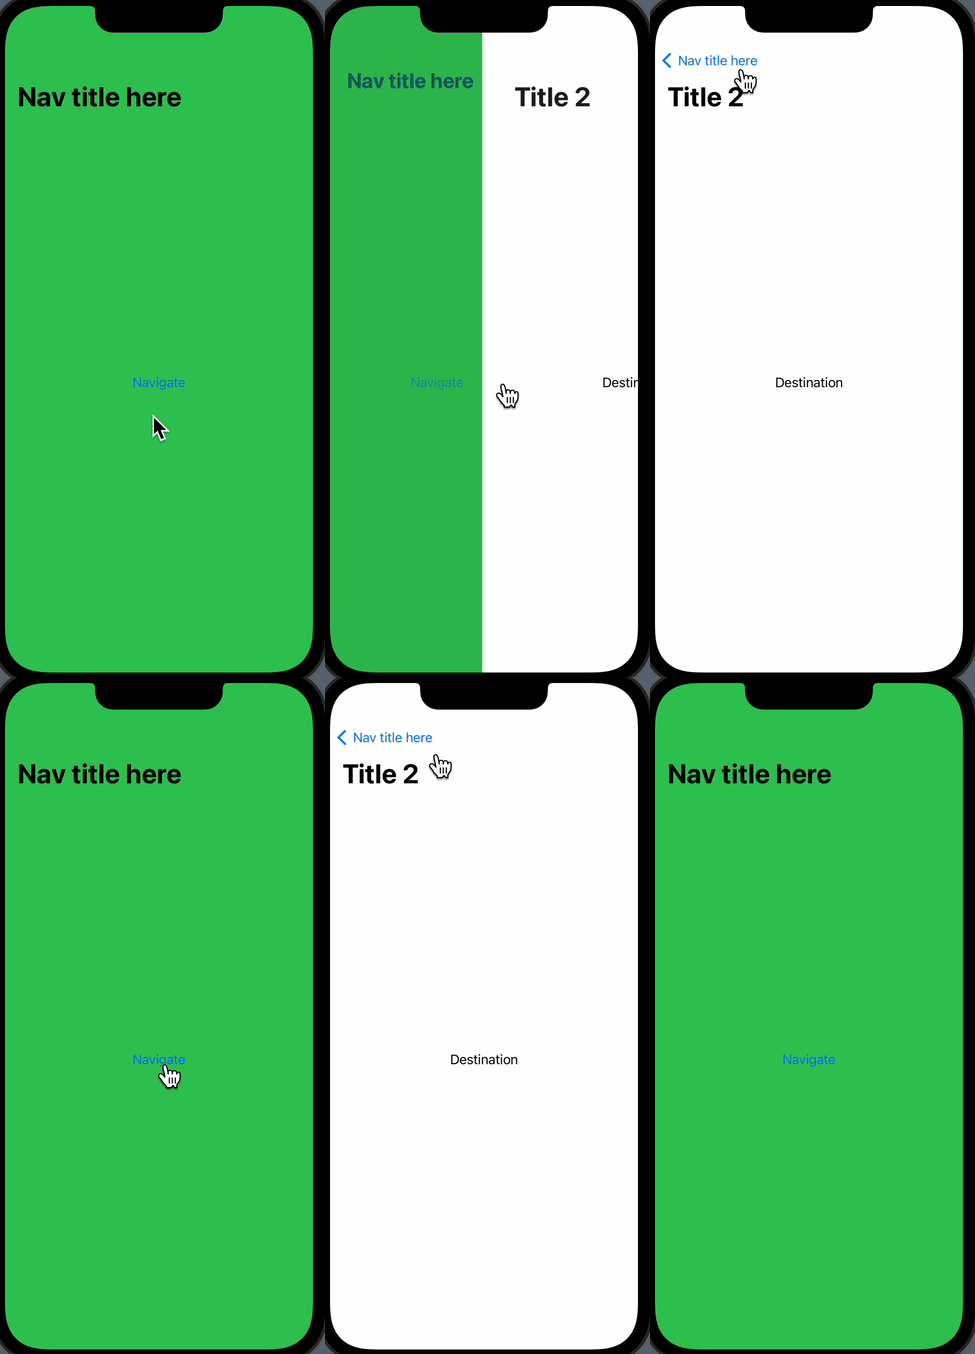
}The default NavigationView comes with swiftUI is not that customizable. But you could build a custom Nav View and Bar are actually create wrappers and wrap them around the default navigation view and link
But on the screen it's going to appear like we're using our own custom navigationView. To be possible by using ViewBuilders and PreferenceKeys
// Default NavigationView in Apple's API
struct AppNavBarView: View {
// MARK: -  PROPERTY
// MARK: -  BODY
var body: some View {
NavigationView {
ZStack {
Color.green.ignoresSafeArea()

NavigationLink(destination: Text("Destination")
                .navigationTitle("Title 2")
                .navigationBarBackButtonHidden(false)) {
  Text("Navigate")
}
}
.navigationTitle("Nav title here")
} //: NAVIGATION
}
}
// in CustomNavBarTitlePreferenceKey
import Foundation
import SwiftUI
struct CustomNavBarTitlePreferenceKey: PreferenceKey {
static var defaultValue: String = ""
static func reduce(value: inout String, nextValue: () -> String) {
value = nextValue()
}
}
struct CustomNavBarSubtitlePreferenceKey: PreferenceKey {
static var defaultValue: String? = nil
static func reduce(value: inout String?, nextValue: () -> String?) {
value = nextValue()
}
}
struct CustomNavBarBackButtonHiddenPreferenceKey: PreferenceKey {
static var defaultValue: Bool = false
static func reduce(value: inout Bool, nextValue: () -> Bool) {
value = nextValue()
}
}
extension View {
func customNavigationTile(_ title: String) -> some View {
self
.preference(key: CustomNavBarTitilePreferenceKey.self, value: title)
}
func customNavigationSubtitle(_ subtitle: String?) -> some View {
self
.preference(key: CustomNavBarSubtitlePreferenceKey.self, value: subtitle)
}
func customNavigationBarBackButtonHidden(_ hidden: Bool) -> some View {
self
.preference(key: CustomNavBarBackButtonHiddenPreferenceKey.self, value: hidden)
}
// combine above three functions
func customNavBarItems(title: String = "", subtitle: String? = nil, backButtonHidden: Bool = false) -> some View {
self
.customNavigationTile(title)
.customNavigationSubtitle(subtitle)
.customNavigationBarBackButtonHidden(backButtonHidden)
}
}// in CustomNavLink
struct CustomNavLink<Label:View, Destination:View>: View {
let destination: Destination
let label: Label
init(destination: Destination, @ViewBuilder label: () -> Label) {
self.destination = destination
self.label = label()
}
var body: some View {
NavigationLink(
destination:
CustomNavBarContainerView(content: {
destination
}).navigationBarHidden(true)){
label
}
}
}
struct CustomNavLink_Previews: PreviewProvider {
static var previews: some View {
CustomNavView {
CustomNavLink(
destination: Text("Destination")) {
Text("Click Me")
}
}
}
}// in CustomNavBarContainerView
// MARK: - VIEW
struct CustomNavBarContainerView<Content: View>: View {
// MARK: - PROPERTY
let content: Content
@State private var showBackButton: Bool = true
@State private var title: String = ""
@State private var subtitle: String? = nil
init(@ViewBuilder content: () -> Content) {
self.content = content()
}
// MARK: - BODY
var body: some View {
VStack (spacing: 0) {
CustomNavBarView(showBackButton: showBackButton, title: title, subtitle: subtitle)
content
.frame(maxWidth: .infinity, maxHeight: .infinity)
}
.onPreferenceChange(CustomNavBarTitilePreferenceKey.self) { value in
self.title = value
}
.onPreferenceChange(CustomNavBarSubtitlePreferenceKey.self) { value in
self.subtitle = value
}
.onPreferenceChange(CustomNavBarBackButtonHiddenPreferenceKey.self) { value in
self.showBackButton = !value
}
}
}
// MARK: - PREVIEW
struct CustomNavBarContainerView_Previews: PreviewProvider {
static var previews: some View {
CustomNavBarContainerView {
ZStack {
Color.green.ignoresSafeArea()
Text("Hello")
.foregroundColor(.white)
.customNavigationTile("New Title")
.customNavigationSubtitle("subtitle")
.customNavigationBarBackButtonHidden(true)
}
}
}
}// in CustomNavBarView
// MARK: - VIEW
struct CustomNavBarView: View {
// MARK: - PROPERTY
@Environment(\.presentationMode) var presentationMode
let showBackButton: Bool
let title: String
let subtitle: String?
// MARK: - BODY
var body: some View {
HStack {
if showBackButton {
backButton
}
Spacer()
titleSection
Spacer()
if showBackButton {
backButton
.opacity(0)
}
} //: HSTACK
.padding()
.accentColor(.white)
.foregroundColor(.white)
.font(.headline)
.background(Color.blue.ignoresSafeArea(edges: .top))
}
}
// MARK: - PREVIEW
struct CustomNavBarView_Previews: PreviewProvider {
static var previews: some View {
VStack {
CustomNavBarView(showBackButton: true, title: "Title here", subtitle: "Subtitle goes here")
Spacer()
}
}
}
extension CustomNavBarView {
private var backButton: some View {
Button {
presentationMode.wrappedValue.dismiss()
} label: {
Image(systemName: "chevron.left")
}
}
private var titleSection: some View {
VStack (spacing: 4) {
Text(title)
.font(.title)
.fontWeight(.semibold)
if let subtitle = subtitle {
Text(subtitle)
}
} //: VSTACK
}
}// in CustomNavView
struct CustomNavView<Content:View>: View {
// MARK: - PROPERTY
let content: Content
init(@ViewBuilder content: () -> Content) {
self.content = content()
}
// MARK: - BODY
var body: some View {
NavigationView {
CustomNavBarContainerView {
content
}
.navigationBarHidden(true)
} //: NAVIGATION
.navigationViewStyle(.stack)
}
}
// MARK: - PREVIEW
struct CustomNavView_Previews: PreviewProvider {
static var previews: some View {
CustomNavView {
Color.red.ignoresSafeArea()
}
}
}
// enable drag back gesture in CustomNavBar
extension UINavigationController {
open override func viewDidLoad() {
super.viewDidLoad()
interactivePopGestureRecognizer?.delegate = nil
}
}struct AppNavBarView: View {
// MARK: - BODY
var body: some View {
CustomNavView {
ZStack {
Color.orange.ignoresSafeArea()
CustomNavLink(destination:
Text("Destination")
.customNavigationTile("Second Screen")
.customNavigationSubtitle("Sibtitle should be showing!!")
) {
Text("Navigate")
}
} //: ZSTACK
.customNavBarItems(title: "New Title!", subtitle: nil, backButtonHidden: true)
}
}
}
// MARK: - PREVIEW
struct AppNavBarView_Previews: PreviewProvider {
static var previews: some View {
AppNavBarView()
}
}
// MARK: - EXTENSTION
extension AppNavBarView {
private var defaultNavView: some View {
NavigationView {
ZStack {
Color.green.ignoresSafeArea()
NavigationLink(destination: Text("Destination")
.navigationTitle("Title 2")
.navigationBarBackButtonHidden(false)) {
Text("Navigate")
}
}
.navigationTitle("Nav title here")
} //: NAVIGATION
}
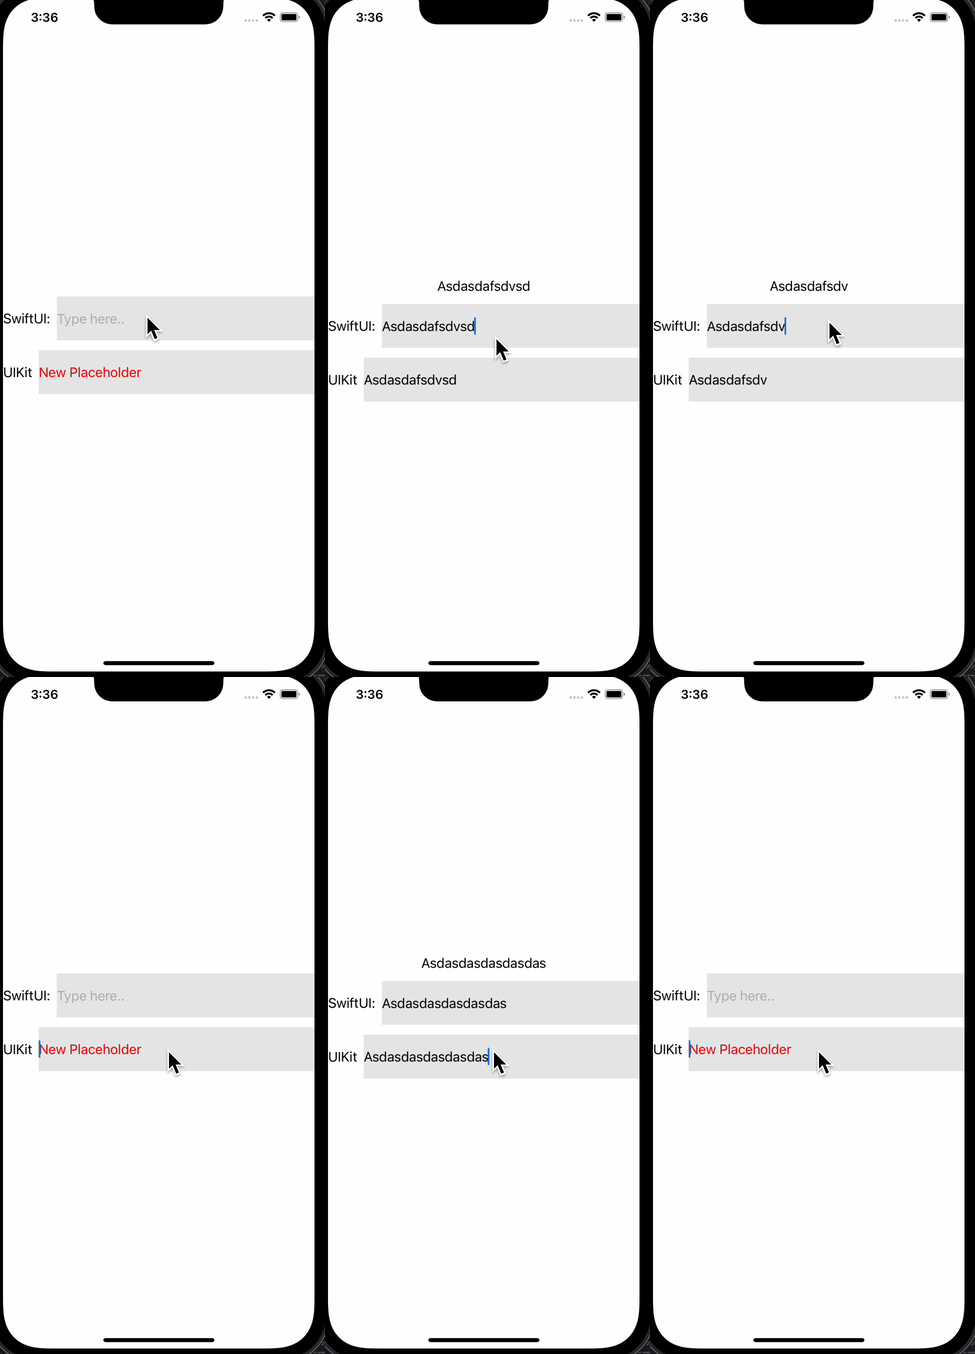
}UIViewRepresentable is the simple wrapper that we can use to take UIKit components and put them into SwiftUI. There are still a lot of components un UIKit that are not available or not as customizable in SwiftUI
Occasionally, you might want to take a UIKit component and then put it in your SwiftUI APP. If you do run into a situation we want to convert an object like how to get a UIKit object onto the screen and how to interact between the UIKit and SwiftUI objects
// Convert a UIView from UIKit to SwiftUI
struct UIViewRepresentableBootCamp: View {
// MARK: -  PROPERTY
// MARK: -  BODY
var body: some View {
  VStack {
    Text("Hello")
    BasicUIViewRepresentable()
  } //: VSTACK
}
}

// MARK: -  PREVIEW
struct UIViewRepresentableBootCamp_Previews: PreviewProvider {
static var previews: some View {
  UIViewRepresentableBootCamp()
}
}

struct BasicUIViewRepresentable: UIViewRepresentable {

func makeUIView(context: Context) -> some UIView {
  let view = UIView()
  view.backgroundColor = .red
  return view
}

func updateUIView(_ uiView: UIViewType, context: Context) {

}
}
import SwiftUI
// Convert a UIView from UIKit to SwiftUI
struct UIViewRepresentableBootCamp: View {
// MARK: - PROPERTY
@State private var text: String = ""
// MARK: - BODY
var body: some View {
VStack {
Text(text)
HStack {
Text("SwiftUI:")
TextField("Type here..", text: $text)
.frame(height: 55)
.background(Color.gray.opacity(0.2))
}
HStack {
Text("UIKit")
UITextFieldViewRepresentable(text: $text)
.updatePlaceholder("New Placeholder")
.frame(height: 55)
.background(Color.gray.opacity(0.2))
}
} //: VSTACK
}
}
// MARK: - PREVIEW
struct UIViewRepresentableBootCamp_Previews: PreviewProvider {
static var previews: some View {
UIViewRepresentableBootCamp()
}
}
struct UITextFieldViewRepresentable: UIViewRepresentable {
@Binding var text: String
var placeholder: String
let placeholderColor: UIColor
init(text: Binding<String>, placeholder: String = "Default placeholder...", placeholderColor: UIColor = .red) {
self._text = text
self.placeholder = placeholder
self.placeholderColor = placeholderColor
}
func makeUIView(context: Context) -> UITextField {
let textfield = getTextField()
textfield.delegate = context.coordinator
return textfield
}
// send data from SwiftUI to UIKit
func updateUIView(_ uiView: UITextField, context: Context) {
uiView.text = text
}
private func getTextField() -> UITextField {
let textfield = UITextField(frame: .zero)
let placeholder = NSAttributedString(
string: placeholder,
attributes: [
.foregroundColor : placeholderColor
])
textfield.attributedPlaceholder = placeholder
// textfield.delegate
return textfield
}
func updatePlaceholder(_ text: String) -> UITextFieldViewRepresentable {
var viewRepresentable = self
viewRepresentable.placeholder = text
return viewRepresentable
}
// Send data from UIKit to SwiftUI
func makeCoordinator() ->Coordinator {
return Coordinator(text: $text)
}
class Coordinator: NSObject, UITextFieldDelegate {
@Binding var text: String
init(text: Binding<String>) {
self._text = text
}
func textFieldDidChangeSelection(_ textField: UITextField) {
text = textField.text ?? ""
}
}
}UIViewRepresentable used to take a view in UIKit convert it into SwiftUI. The only difference between UIViewRepresentable and UIViewControllerRepresentable to control entire controller. Controller essentially a screen and UIKit instead of just a sub view
struct UIViewControllerRepresentableBootCamp: View {
// MARK: -  PROPERTY
@State private var showScreen: Bool = false
// MARK: -  BODY
var body: some View {
VStack {
  Text("Hi")

  Button {
    showScreen.toggle()
  } label: {
    Text("Click Here")
  }
  .sheet(isPresented: $showScreen) {
    BasicUIViewControllerRepresentalbe(lableText: "New Screen!!")
  }
}
}
}

// MARK: -  PREVIEW
struct UIViewControllerRepresentableBootCamp_Previews: PreviewProvider {
static var previews: some View {
  UIViewControllerRepresentableBootCamp()
}
}

// MARK: -  UIViewControllerRepresentable
struct BasicUIViewControllerRepresentalbe: UIViewControllerRepresentable {

let lableText: String

func makeUIViewController(context: Context) -> some UIViewController {
  let vc = MyFirstViewController()
  vc.lableText = lableText
  return vc
}

func updateUIViewController(_ uiViewController: UIViewControllerType, context: Context) {

}
}

class MyFirstViewController: UIViewController {

var lableText: String = "Starting value"
override func viewDidLoad() {
  super.viewDidLoad()

  view.backgroundColor = .blue

  let label = UILabel()
  label.text = lableText
  label.textColor = UIColor.white

  view.addSubview(label)
  label.frame = view.frame
}
}struct UIViewControllerRepresentableBootCamp: View {
// MARK: - PROPERTY
@State private var showScreen: Bool = false
@State private var image: UIImage? = nil
// MARK: - BODY
var body: some View {
VStack {
Text("Hi")
if let image = image {
Image(uiImage: image)
.resizable()
.scaledToFit()
.frame(width: 200, height: 200)
}
Button {
showScreen.toggle()
} label: {
Text("Click Here")
}
.sheet(isPresented: $showScreen) {
UIImagePickerControllerRepresentable(image: $image, showScreen: $showScreen)
}
}
}
}
// MARK: - PREVIEW
struct UIViewControllerRepresentableBootCamp_Previews: PreviewProvider {
static var previews: some View {
UIViewControllerRepresentableBootCamp()
}
}
struct UIImagePickerControllerRepresentable: UIViewControllerRepresentable {
@Binding var image: UIImage?
@Binding var showScreen: Bool
func makeUIViewController(context: Context) -> UIImagePickerController {
let vc = UIImagePickerController()
vc.allowsEditing = false
vc.delegate = context.coordinator
return vc
}
// from SwiftUI to UIKit
func updateUIViewController(_ uiViewController: UIImagePickerController, context: Context) {
}
// from UIKit to SwiftUI
func makeCoordinator() -> Coordinator {
return Coordinator(image: $image, showScreen: $showScreen)
}
class Coordinator: NSObject, UIImagePickerControllerDelegate, UINavigationControllerDelegate {
@Binding var image: UIImage?
@Binding var showScreen: Bool
init(image: Binding<UIImage?>, showScreen: Binding<Bool>) {
self._image = image
self._showScreen = showScreen
}
func imagePickerController(_ picker: UIImagePickerController, didFinishPickingMediaWithInfo info: [UIImagePickerController.InfoKey : Any]) {
guard let newImage = info[.originalImage] as? UIImage else { return }
image = newImage
showScreen = false
}
}
}A Protocol is just a simple set of rules or requirements that a struct or class needs to have. In Swift, Creating protocol actually pretty simple all you have to do is give it a name and then inside the protocol we list out all of the requirements. These requirements are generally just variables and functions that a class or struct would then need to have.
For example in the SwiftUI, Every time we make a new View it is a struct we give it a name and then we make that struct conform to view. This view is actually a protocol and the requirement of the view protocol is that the struct has a body.
When we create our own protocols we can give it custom names and requirements.
Use protocols to really efficiently add dependency injection and then testing into your Apps
// MARK: -  VIEWMODEL
class DefaultDataSource: ButtonTextProtocol, ButtonPressedProtocol {
var buttonText: String = "Protocol are Awesome"

func buttonPressed() {
print("Button was pressed!")
}
}

class AlternativeDataSource: ButtonTextProtocol {
var buttonText: String = "Protocol are Cool"
func buttonPressed() {

}
}


// MARK: -  VIEW
struct ProtocolBootCamp: View {
// MARK: -  PROPERTY
// let colorTheme: DefaultColorTheme = DefaultColorTheme()
// let colorTheme: AlternativeColorTheme = AlternativeColorTheme()
let colorTheme: ColorThemeProtocol
let dataSource: ButtonTextProtocol
let dataSource2: ButtonPressedProtocol

// MARK: -  BODY
var body: some View {
  ZStack {
    colorTheme.tertiary.ignoresSafeArea()

    Text(dataSource.buttonText)
      .font(.headline)
      .foregroundColor(colorTheme.secondary)
      .padding()
      .background(colorTheme.primary)
      .cornerRadius(10)
      .onTapGesture {
        dataSource2.buttonPressed()
      }
  }
}
}

// MARK: -  PREVIEW
struct ProtocolBootCamp_Previews: PreviewProvider {
static var previews: some View {
  ProtocolBootCamp(colorTheme: DefaultColorTheme(), dataSource2: DefaultDataSource())
}
}

// MARK: -  ColorTheme
struct DefaultColorTheme: ColorThemeProtocol {
let primary: Color = .blue
let secondary: Color = .white
let tertiary: Color = .gray
}

struct AlternativeColorTheme: ColorThemeProtocol {
let primary: Color = .red
let secondary: Color = .white
let tertiary: Color = .green
}

struct AnotherColorTheme: ColorThemeProtocol {
var primary: Color = .blue
var secondary: Color = .red
var tertiary: Color = .purple
}

// MARK: -  PROTOCOL
protocol ColorThemeProtocol {
var primary: Color { get }
var secondary: Color { get }
var tertiary: Color { get }
}

protocol ButtonTextProtocol {
var buttonText: String { get }

}

protocol ButtonPressedProtocol {
func buttonPressed()
}Nowadays, Dependency injection is a really hot term. This is actually injecting your dependencies but what that really means is when we create a struct or class that has dependencies instead of referencing the dependencies from within the class or within the struct themselves.
We're going to actually inject the dependencies into the struct through the initializer. So if you've been using custom and inits in your struct in you classes you've already been doing a little bit of dependency injection
We can programmatically change what is injected into the class so we can change our inputs we can customize the init so that the structure of the class maybe performs or acts differently. It is important thing is your app architecture cause when you've using dependency injection at some point in your code you're going to create your dependencies and then you're going to inject and pass those dependencies throughout all your views your classes your ViewModels
To figure out when we should actually create those dependencies and what is the flow where we should actually pass those dependencies to all of those structs and classes
- Before dependency Injection, Fetch fakeData from JSONplaceholder by using Combine
JSONplaceholder : https://jsonplaceholder.typicode.com/posts
import SwiftUI
import Combine

// MARK: -  MODEL
struct PostModel: Identifiable, Codable {
let userId: Int
let id: Int
let title: String
let body: String
}

// MARK: -  DATA SERVICE
class ProductionDataService {
static let instance = ProductionDataService() // Singleton

let url: URL = URL(string: "https://jsonplaceholder.typicode.com/posts")!

func getData() -> AnyPublisher<[PostModel], Error> {
  URLSession.shared.dataTaskPublisher(for: url)
    .map({ $0.data })
    .decode(type: [PostModel].self, decoder: JSONDecoder())
    .receive(on: DispatchQueue.main)
    .eraseToAnyPublisher()
}
}

// MARK: -  VIEWMODEL
class DependencyInjectionViewModel: ObservableObject {
// MARK: -  PROPERTY
@Published var dataArray: [PostModel] = []
var cancellables = Set<AnyCancellable>()
// MARK: -  INIT
init() {
loadPosts()
}
// MARK: -  FUNCTION
private func loadPosts() {
ProductionDataService.instance.getData()
  .sink { _ in

  } receiveValue: { [weak self] returnedPosts in
    self?.dataArray = returnedPosts
  }
  .store(in: &cancellables)

}
}

// MARK: -  VIEW
struct DependencyInjectionBootCamp: View {
// MARK: -  PROPERTY
@StateObject private var vm = DependencyInjectionViewModel()
// MARK: -  BODY
var body: some View {
ScrollView {
  VStack {
    ForEach(vm.dataArray) { post in
      Text(post.title)
    }
  } //: VSTACK
} //: SCROLL
}
}
Dependency Injection is basically the solution or an alternative to using the singleton design pattern. Singleton Pattern great for when you are learning out of code but there are a lot of flaws and problems with using singletons
-
The Problem of using Singletons
-
Singleton's are GLOBAL : We can access this instance from anywhere in our code. When you start making larger apps It's going to get confusing if you have a bunch of global variables. Additionally, if you have singleton instance and it's being accessed from a bunch of different places in your app at the same time you could run into some really big problems if maybe you're using a multi-threaded environment so you're doing different tasks on different threads and those different threads are trying to access the same instance at the same time you could end up getting a bunch of crashes in your app
-
Can't customize the init! : When we initialize our production data service as a singleton we're not initializing it with any data. It is important when you start trying to add testing to your app
-
Can't swap out dependencies : We can use protocols to swap things in an out of app. But if your app is always referencing the production data service instance always going to end up referencing this exact class and therefore we have to use this exact data service we can't use another data service
-
So, avoid to these problems in Singleton is to use dependency injection.
If the data service we want to initialize it pretty much early on in our app almost at the beginning of our app and then inject it into the res of our app all the Views and ViewModels that need a reference to the data service
import SwiftUI
import Combine

// MARK: -  MODEL
struct PostModel: Identifiable, Codable {
	let userId: Int
let id: Int
let title: String
let body: String
}

// MARK: -  PROTOCOL
// To use Protocol swap in and out whatever we want to use as the data service
// if we were testing or maybe just developing quickly we could then use our mock data service
protocol DataServiceProtocol {
func getData() -> AnyPublisher<[PostModel], Error>
}

// MARK: -  DATA SERVICE
class ProductionDataService {
let url: URL

init(url: URL) {
self.url = url
}

func getData() -> AnyPublisher<[PostModel], Error> {
URLSession.shared.dataTaskPublisher(for: url)
  .map({ $0.data })
  .decode(type: [PostModel].self, decoder: JSONDecoder())
  .receive(on: DispatchQueue.main)
  .eraseToAnyPublisher()
}
}

class MockDataService: DataServiceProtocol {

let testData: [PostModel]

init(data: [PostModel]?) {
self.testData = data ?? [
  PostModel(userId: 1, id: 1, title: "One", body: "one one"),
  PostModel(userId: 2, id: 2, title: "Two", body: "two two")
]
}

func getData() -> AnyPublisher<[PostModel], Error> {
Just(testData)
  .tryMap({ $0 })
  .eraseToAnyPublisher()
}
}


// MARK: -  VIEWMODEL
class DependencyInjectionViewModel: ObservableObject {
// MARK: -  PROPERTY
@Published var dataArray: [PostModel] = []
var cancellables = Set<AnyCancellable>()
let dataService: DataServiceProtocol
// MARK: -  INIT
// Not Global access in ProductionDataService
init(dataService: DataServiceProtocol) {
  self.dataService = dataService
  loadPosts()
}
// MARK: -  FUNCTION
private func loadPosts() {
  dataService.getData()
    .sink { _ in

    } receiveValue: { [weak self] returnedPosts in
      self?.dataArray = returnedPosts
    }
    .store(in: &cancellables)

}
}

// MARK: -  VIEW
struct DependencyInjectionBootCamp: View {
// MARK: -  PROPERTY
@StateObject private var vm: DependencyInjectionViewModel

init(dataService: DataServiceProtocol) {
_vm = StateObject(wrappedValue: DependencyInjectionViewModel(dataService: dataService))
}
// MARK: -  BODY
var body: some View {
ScrollView {
  VStack {
    ForEach(vm.dataArray) { post in
      Text(post.title)
    }
  } //: VSTACK
} //: SCROLL
}
}

// MARK: -  PREVIEW
struct DependencyInjectionBootCamp_Previews: PreviewProvider {

// Can customize init
// static let dataService = ProductionDataService(url: URL(string: "https://jsonplaceholder.typicode.com/posts")!)
static let dataService = MockDataService(data: nil)
static var previews: some View {
DependencyInjectionBootCamp(dataService: dataService)
}
}Future publishers basically a wrapper that where we can take functions that have regular escape closure and convert them into publisher so that we can use them in combine
- download with @escaping closure - the legacy wat of how worked with asynchronous code before Combine
- download with Combine - Use subscribers and publishers
How can we convert that code so that we can use it with Combine so that we can convert the @escaping closure into a publisher that we can then subscribe to in Combine
The purpose is that if we're using Combine across our entire app and then we run into maybe a couple of functions that are not publishers and we want to convert those to publishers so that we can then use them in our pipelines and intermingle them with all of our other publishers and subscribers we need some way to convert the closure data to a publisher
import SwiftUI
import Combine


// MARK: -  VIEWMODEL
class FuturesBootCampViewModel: ObservableObject {
// MARK: -  PROPERTY
@Published var title: String = "Starting title"
let url = URL(string: "https://www.google.com")!
var cancellables = Set<AnyCancellable>()
// MARK: -  INIT
init() {
download()
}
// MARK: -  FUNCTION
func download() {
// getCombinePublisher()
// 	.sink { _ in
//
// 	} receiveValue: { [weak self] returnedValue in
// 		self?.title = returnedValue
// 	}
// 	.store(in: &cancellables)

// getEscapingClosure { [weak self] returnedValue , error in
// 	self?.title = returnedValue
// }

getFuturePublisher()
  .sink { _ in

  } receiveValue: { [weak self] returnedValue in
    self?.title = returnedValue
  }
  .store(in: &cancellables)

}

func getCombinePublisher() -> AnyPublisher<String, URLError> {
URLSession.shared.dataTaskPublisher(for: url)
  .timeout(1, scheduler: DispatchQueue.main)
  .map({ _ in
    return "New Value"
  })
  .eraseToAnyPublisher()
}

func getEscapingClosure(completionHandler: @escaping (_ value: String, _ error: Error?) -> Void) {
URLSession.shared.dataTask(with: url) { data, response, error in
  completionHandler("New value 2", nil)
}
.resume()
}

// Future : It's prodicing a single value where our regular publishers can possibly keep publishing over their lifetime and be subscurbed to them forever
// Promise: The function promising that it will return a value in the future
func getFuturePublisher() -> Future<String, Error> {
  Future { promise in
  self.getEscapingClosure { returnedValue, error in
    if let error = error {
      promise(.failure(error))
    } else {
      promise(.success(returnedValue))
    }
  }
}
}

// asyncroous code with @escaping
func doSomething(completionHandler: @escaping (_ value: String) -> ()) {
  DispatchQueue.main.asyncAfter(deadline: .now() + 4) {
    completionHandler("NEW STRING")
  }
}
// @escaping logic convert to Combine by using Future
func doSomethingInTheFuture() -> Future<String, Never> {
  Future { promise in
    self.doSomething { value in
      promise(.success(value))
    }
  }
}
}

// MARK: -  VIEW
struct FutherBootCamp: View {
// MARK: -  PROPERTY
@StateObject private var vm = FuturesBootCampViewModel()

// MARK: -  BODY
var body: some View {
  Text(vm.title)
}
}Unit Testing is testing all of basically your code your logic in your app.
SwiftUI Continued Learning (Advanced Level) - https://www.youtube.com/c/SwiftfulThinking

